The Garage Makeover Series is back on track! Sort of. Once again, I am going a little out of order. Part 3 was supposed to be the installation of the drywall. While we did manage to get the majority of that project completed this weekend, the workbench was finished last week and I already had the blog post cued up and ready to roll. Hence the switch.
This particular workbench was inspired by Part 2 of the Series - Custom Shelves. I thought the shelves turned out really sturdy and fairly attractive for what they were. So I decided to scale down the project into a workbench format. That way my workbench would match the shelving and it would be just as reliable and sturdy.
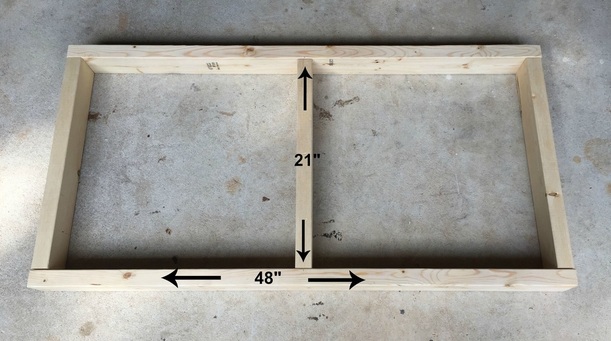
I started by determining my dimensions. I decided to make the height 36 inches. This might be a little higher than some workbenches, but I knew I wanted enough room for a big shelf underneath it. My plan is to put a peg board right over the bench to hang the tools I use the most. Since the dimensions of my peg board are 48" X 48", I determined that the length of my workbench should be the same. I determined the depth by cutting that number in half. I wanted to be able to reach easily over the bench to retrieve my tools from the peg board. As for the shelf, I basically eyeballed a height that I thought was appropriate. The bottom of the bench ended up measuring 12 inches from the ground.
This particular workbench was inspired by Part 2 of the Series - Custom Shelves. I thought the shelves turned out really sturdy and fairly attractive for what they were. So I decided to scale down the project into a workbench format. That way my workbench would match the shelving and it would be just as reliable and sturdy.
I started by determining my dimensions. I decided to make the height 36 inches. This might be a little higher than some workbenches, but I knew I wanted enough room for a big shelf underneath it. My plan is to put a peg board right over the bench to hang the tools I use the most. Since the dimensions of my peg board are 48" X 48", I determined that the length of my workbench should be the same. I determined the depth by cutting that number in half. I wanted to be able to reach easily over the bench to retrieve my tools from the peg board. As for the shelf, I basically eyeballed a height that I thought was appropriate. The bottom of the bench ended up measuring 12 inches from the ground.

Bench Measurements
With these particular measurements in mind, I created my shopping list and my cut list.
| Materials: (2) 2x4x8s (2) 2x4x12s (1) Sheet of Plywood (52) #8 x 2 1/2 Wood Screws Power Drill Impact Driver Pencil Tape Measurer | Cut List: (4) 2x4 @ 48" - Cut from 2x4x8s (4) 2x4 @ 36" - Cut from 2x4x12s (6) 2x4 @ 21" - Cut from 2x4x12s (2) 24" x 48" Pieces of Plywood - Cut from sheet of plywood |
I already owned several of the items on my list so my shopping list consisted of 2x4s. Normally, I would just ask the guys at the hardware store to make the cuts for me, but there was some sort of kids club going on in the store when I was there. So the big saw was shut down and I had to bring my 2x4s home and cut them with my miter saw. Below is a shot of the cuts after I made them. It is a good photo for those who are visual learners like me.
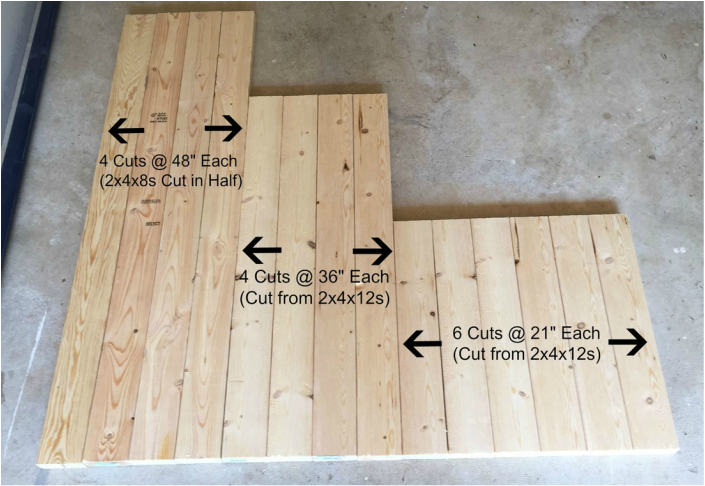
Visual Cut List
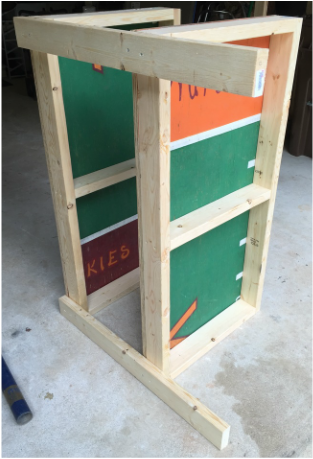
As for the plywood, I recycled some pieces I already had in the garage. They actually came from my college beer pong table. I made the table for one of my birthday parties. It was made to look like the Virginia Tech Football field. I was really proud of it back in the day. But now that I have a baby on the way, I figured it was time to recycle the table into something a little more useful. So I used my circular saw to cut 2 pieces to 24 inches by 48 inches.
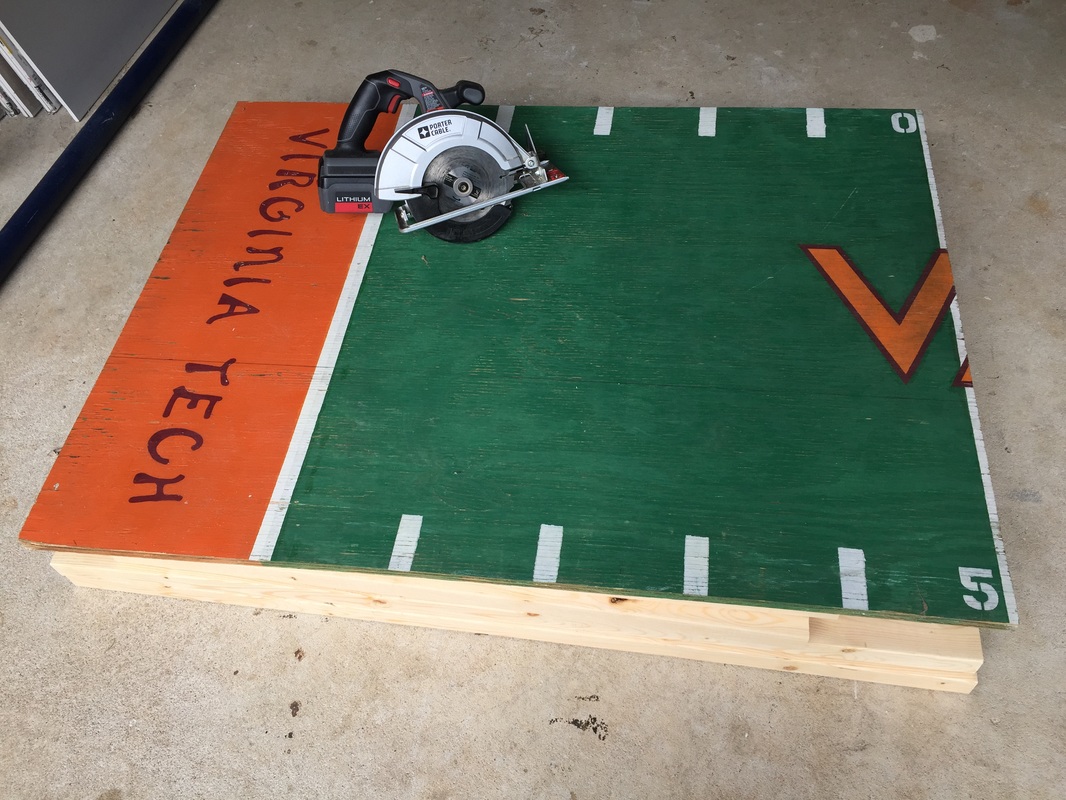 Before - One half of my college beer pong table |  After - The top and shelf of my new workbench |
Once the plywood was cut, I was ready to start assembling all my pieces. I started the same way I did with the custom shelving. I constructed the base of the two shelves. Each shelf base consisted of 2 48" cuts and 3 21" cuts. I lined the 48" cuts up parallel to each other and placed the 21" cuts in between them as supports.
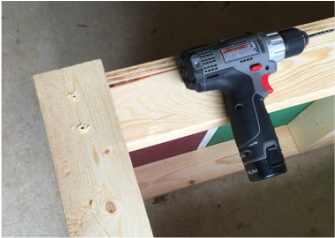
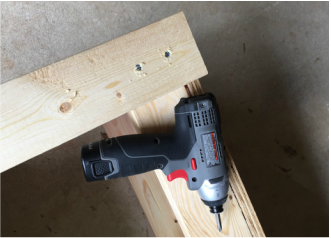
I used the power drill to pre-drill holes through the 48" cuts where they met with the supports. Then I used the impact driver to secure them with the #8 x 2 1/2 inch wood screws.
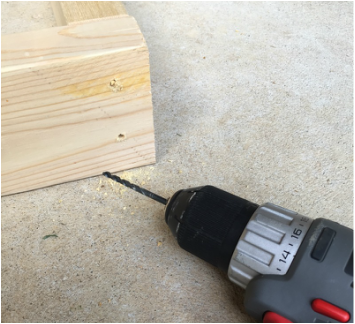 Pre-drill the holes | 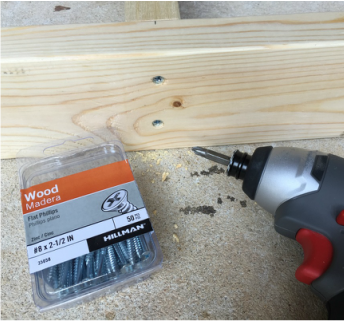 Secure the wood screws |
Once the base for the shelves were built I added the plywood to the tops of them. I used the impact driver to secure the boards to the base with the wood screws. I put a screw in each of the 4 corners and two in the middle where the center support was.
 | 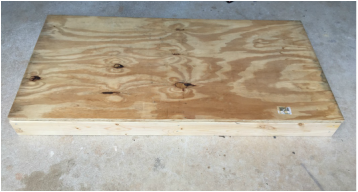 |
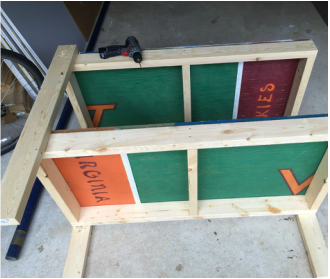
When both shelves were finished I flipped them up onto their sides and prepared to attach the legs.
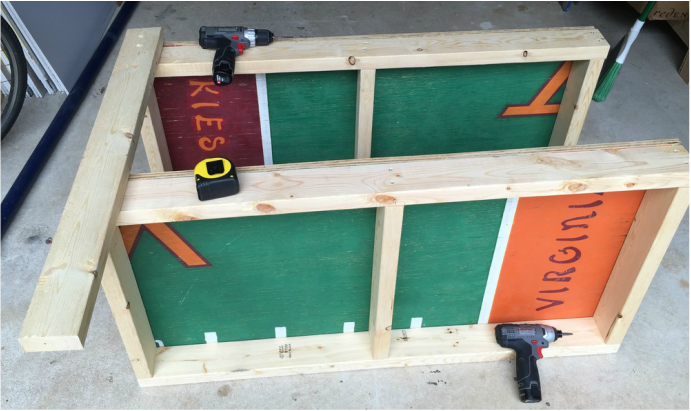
This workbench will forever remind me of my crazy college days
I started with the top of the bench. I pre-drilled holes on the legs with the power drill. I made sure the legs were lined up with the top and sides of the top shelf. Then I used the same screws to secure the legs to the top of the first shelf with the impact driver.
 |  |
Once the legs were secure to the top shelf, I prepared to attach them to the bottom shelf. I used the same method as the top except that I had to measure where the second shelf would go. I measured from the bottom of each leg, 12 inches. When the screws were in and both legs were completely secure, I flipped the whole structure up on its side to avoid having the shelves collapse on the other side.
I placed the whole structure back on the ground facing the other way. Then I repeated the steps on the other side to attach the last two legs. Once they were all on, I flipped the table up onto it's legs.
 | 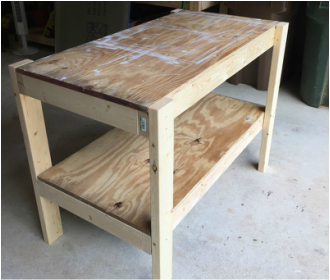 |
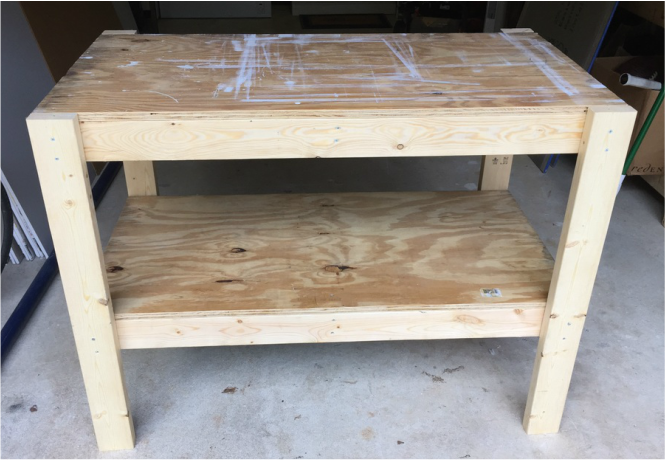
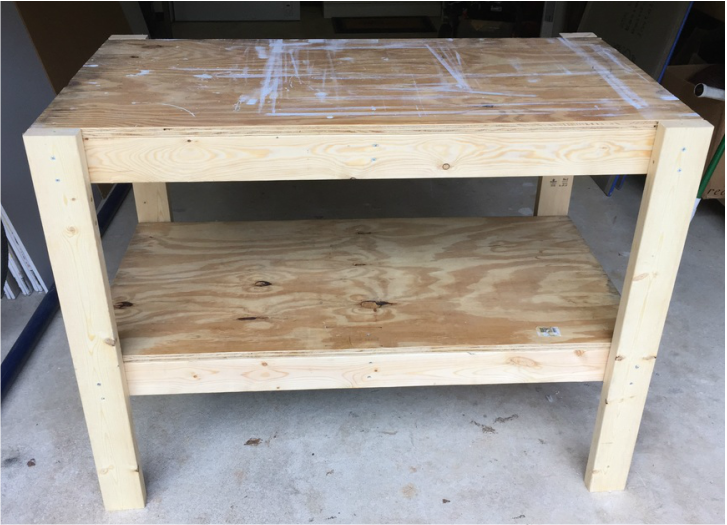
Ta-Da!!! A brand new workbench with a hefty structure, plenty of room to work and lots of storage space. Easy to make, cheap to buy, and quick to assemble. I did this whole project in just over an hour, by myself, and pregnant. If I can do it, so can you!
Stay tuned for more steps in the Garage Makeover Series. Coming soon!
Stay tuned for more steps in the Garage Makeover Series. Coming soon!
BOOM!!!
 RSS Feed
