For my next few posts, I hope to make them a mini-series. Because what better way to force yourself to be productive than to tell the world you are working on a big project with a lot of moving parts that requires weeks worth of determination and hard work? I can only hope that my self-proclamation proves constructive.
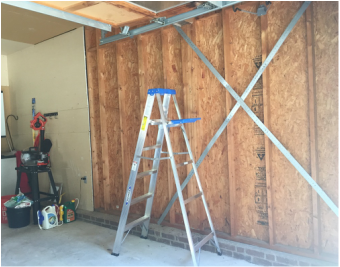
I've been talking about a garage makeover for a long time. As you can see from my photo below, and probably most of the other photos in my blog posts, our garage is a mess. I have all my future projects, currents projects, and some of my failed past projects jumbled together in heaps.
I've been talking about a garage makeover for a long time. As you can see from my photo below, and probably most of the other photos in my blog posts, our garage is a mess. I have all my future projects, currents projects, and some of my failed past projects jumbled together in heaps.
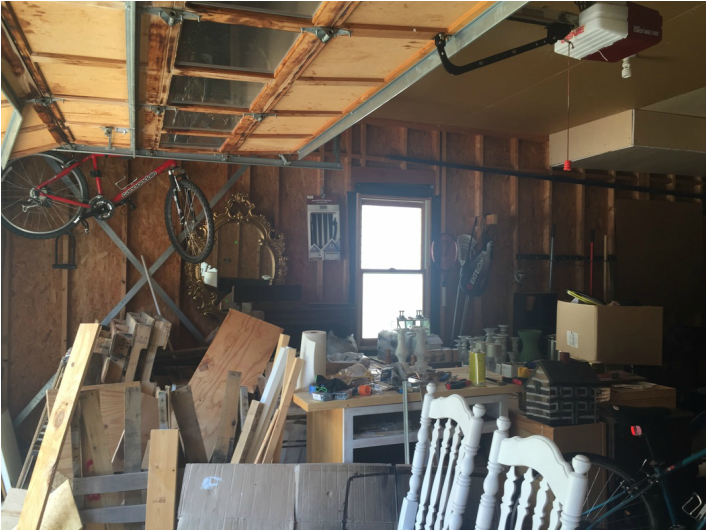
Yes, it is a little out of control
I decided it was time to organize things. I started with a little Pinterest research on "Garage Makeovers" and came up with a lot of really good ideas. So as soon as I got home from a week long vacation this weekend, I started bugging my husband about starting on the garage. The last thing he wanted to do after being away from the house all week was start a labor-intensive project that he knew would consume a lot of our free time. But he did admit that some of my proposed ideas were intriguing. So he humored me and accompanied me to the hardware store for some research.
I decided that Step 1 needed to be drywall. For some reason, the prior owners put up drywall on half of the garage. The rest they left open with visible studs sticking out. It didn't really bother me when we bought the house. After all, it was our first home and we were just happy to have a garage at all. But after a while, it really started to get to me. It just made everything look incomplete. And with all my crap just sitting in the middle of the space, it really made me despise my own garage. Not cool.
I decided that Step 1 needed to be drywall. For some reason, the prior owners put up drywall on half of the garage. The rest they left open with visible studs sticking out. It didn't really bother me when we bought the house. After all, it was our first home and we were just happy to have a garage at all. But after a while, it really started to get to me. It just made everything look incomplete. And with all my crap just sitting in the middle of the space, it really made me despise my own garage. Not cool.
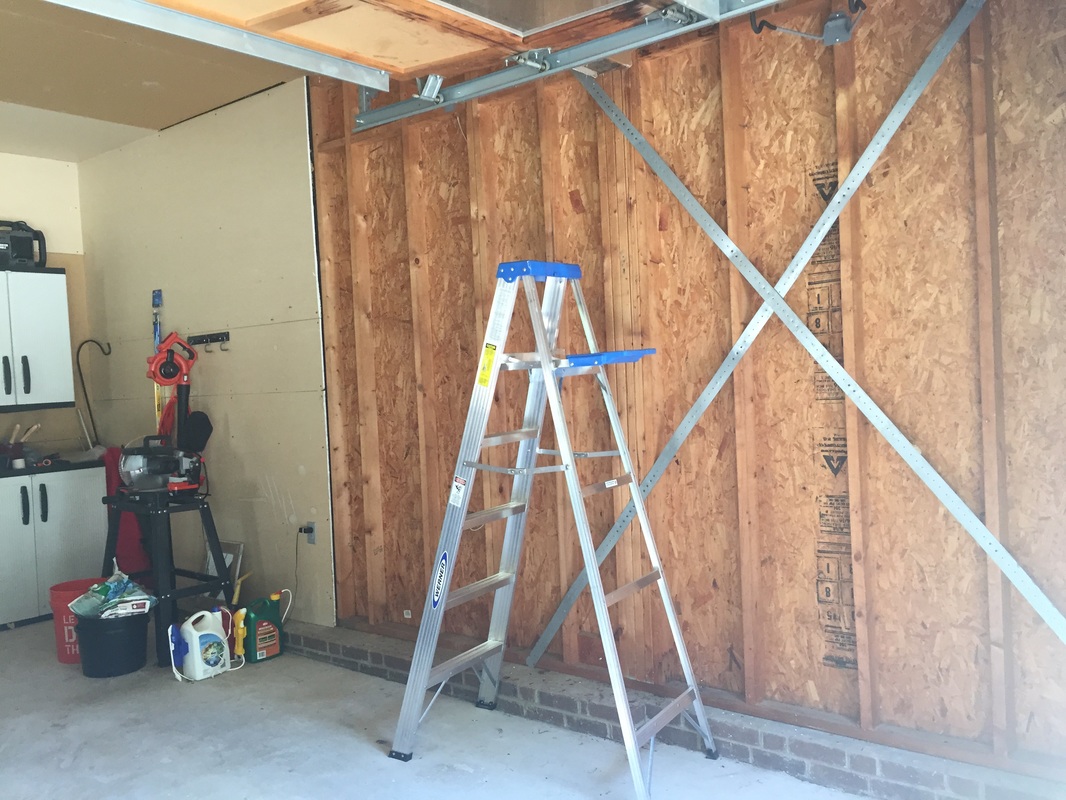 The back portion near the wall is done, but the rest is open and ugly! | 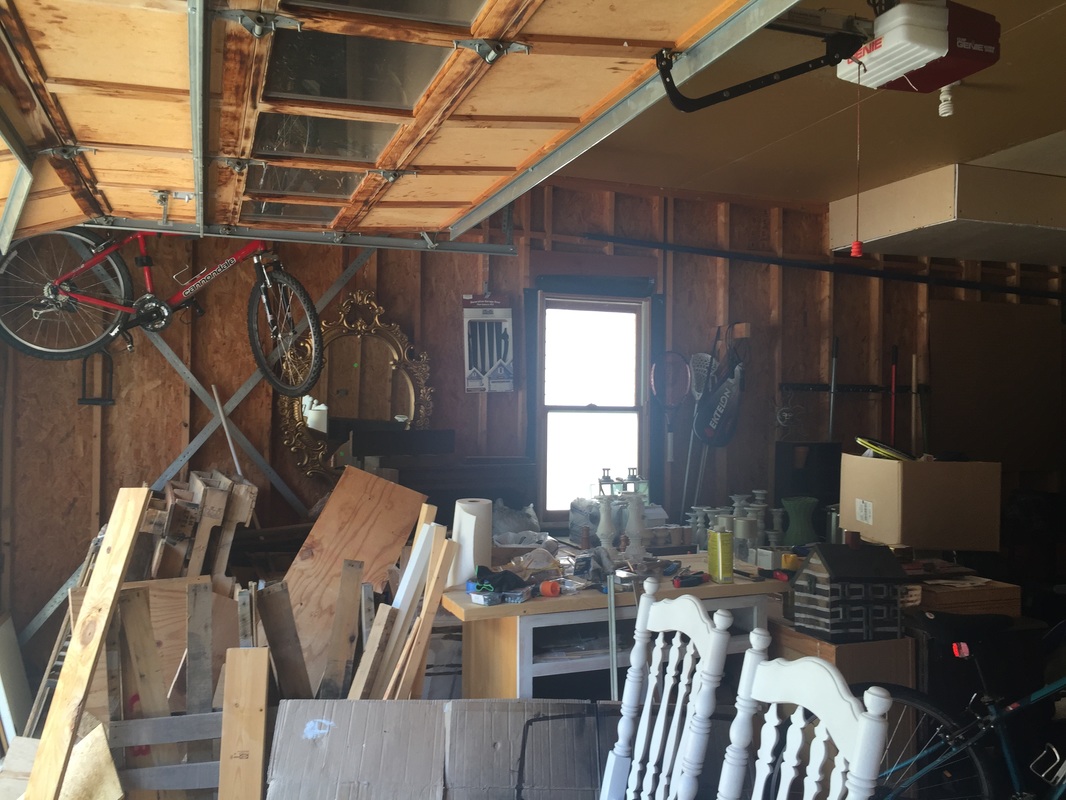 This whole side of the garage is missing drywall, but the ceiling is done - bah! |
Once I started doing measurements and trying to figure out how to cover the rest of the open space, I realized that the prior owners may have just put drywall on the areas that were connected to other walls in the house. I suppose that made sense from an insulation standpoint. But it didn't change my plans to finish the rest of the space. My mind was already set.
As for the one side of the garage that was already partially finished, I noticed that there was another layer of something under the actual drywall. I did some research and figured out that it was a cement board put into place to prevent water damage and mold. So instead of just purchasing the drywall, we decided to purchase the cement boards. We wanted the extra layer of protection and we wanted to make sure we could make the drywall match up with what was currently installed.
I measured all the open spaces and drew the walls in my sketch book. I took my measurements with me to the hardware store with hubby and we got to work on our research. We figured out that the actual drywall boards were not going to fit into my car. However, the cement boards were much smaller and able to fit. So I did some quick calculations and figured out how many boards I would need to fill the empty spaces. We purchased the very heavy cement boards and special screws while we were there and made the trek back home.
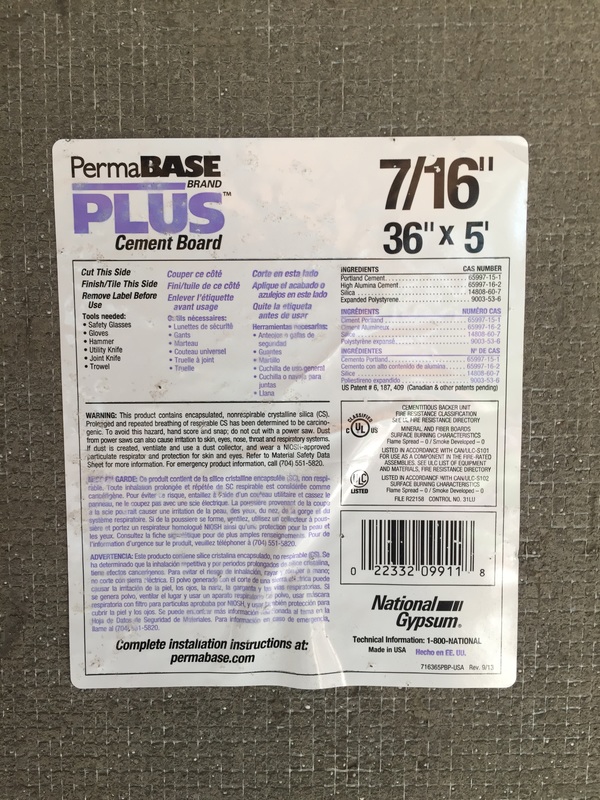 Cement Boards | 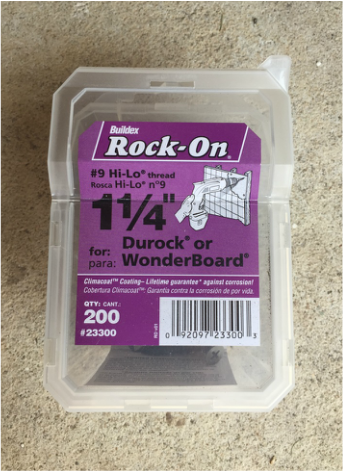 Cement Board Screws |
Once we got home the real fun began. Cement boards are heavy!
We started by clearing out the side of the garage that we wanted to start with. I insisted that we complete the side that was already partially covered. It was a smaller space and would be good practice. We moved everything out of the way, removed loose screws and nails from the studs, and swept out all the spiderwebs.
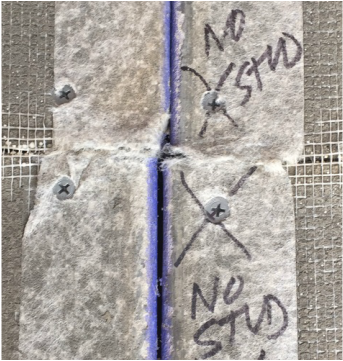
Next we started putting up the cement boards. I'd measured out the space and determined how to place them that would require the least amount of cutting. The first few went in with no cutting necessary. We lined up the boards with the existing ones and I used a level and a sharpie to mark where the studs were underneath the boards. This is a very important step. Trying to guess where to put screws is much harder than you think. I tried to eyeball the first few and it just didn't work out very well.
Once the studs were marked, we used a power drill to drill the screws through the cement boards and into the studs. We made sure to get all four corners of each board as best as possible. Then we put screws approximately a foot apart on each of the studs. The more screws the better. This is only the bottom layer. Another layer of drywall needs to go on top so it is important to make sure this layer is as sturdy as possible.
Because of the way our garage was built, there were a few places that had metal placed on the wood. I made sure to mark on the boards where any metal existed underneath. Drilling screws into metal would have been a disaster.
As for the corners that did not have studs under them, I put some pieces of wood in place that acted as a "fake stud". I wanted to be sure that the corners were secure. For those specific corners, I made sure to mark with a sharpie that there were no studs.
We started by clearing out the side of the garage that we wanted to start with. I insisted that we complete the side that was already partially covered. It was a smaller space and would be good practice. We moved everything out of the way, removed loose screws and nails from the studs, and swept out all the spiderwebs.
Next we started putting up the cement boards. I'd measured out the space and determined how to place them that would require the least amount of cutting. The first few went in with no cutting necessary. We lined up the boards with the existing ones and I used a level and a sharpie to mark where the studs were underneath the boards. This is a very important step. Trying to guess where to put screws is much harder than you think. I tried to eyeball the first few and it just didn't work out very well.
Once the studs were marked, we used a power drill to drill the screws through the cement boards and into the studs. We made sure to get all four corners of each board as best as possible. Then we put screws approximately a foot apart on each of the studs. The more screws the better. This is only the bottom layer. Another layer of drywall needs to go on top so it is important to make sure this layer is as sturdy as possible.
Because of the way our garage was built, there were a few places that had metal placed on the wood. I made sure to mark on the boards where any metal existed underneath. Drilling screws into metal would have been a disaster.
As for the corners that did not have studs under them, I put some pieces of wood in place that acted as a "fake stud". I wanted to be sure that the corners were secure. For those specific corners, I made sure to mark with a sharpie that there were no studs.
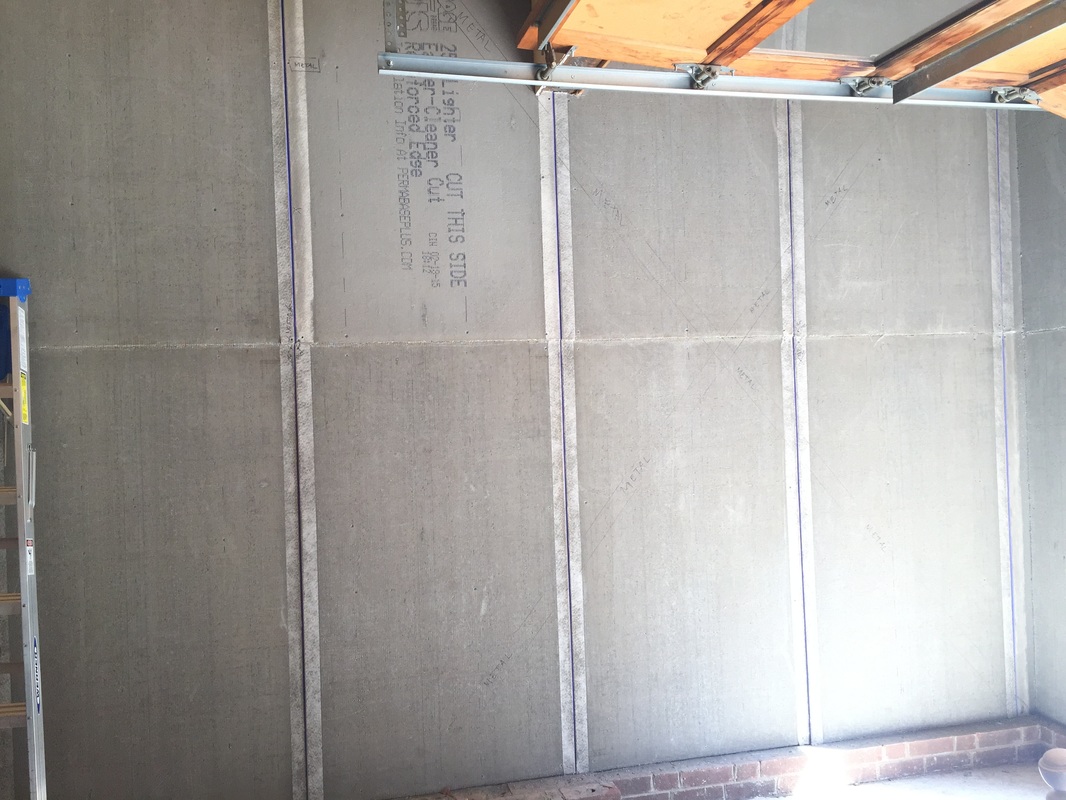
Once the first four boards were secure, we got to the point where we needed to start cutting boards in order to fit them into the remaining spaces.
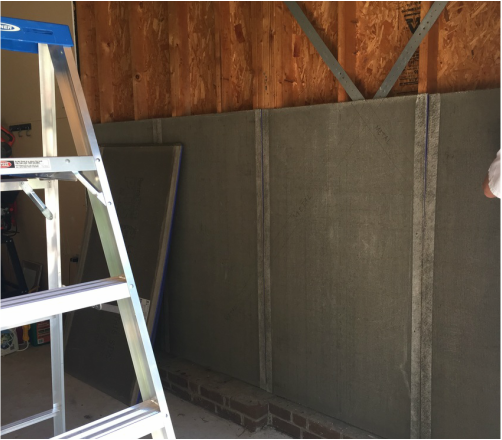
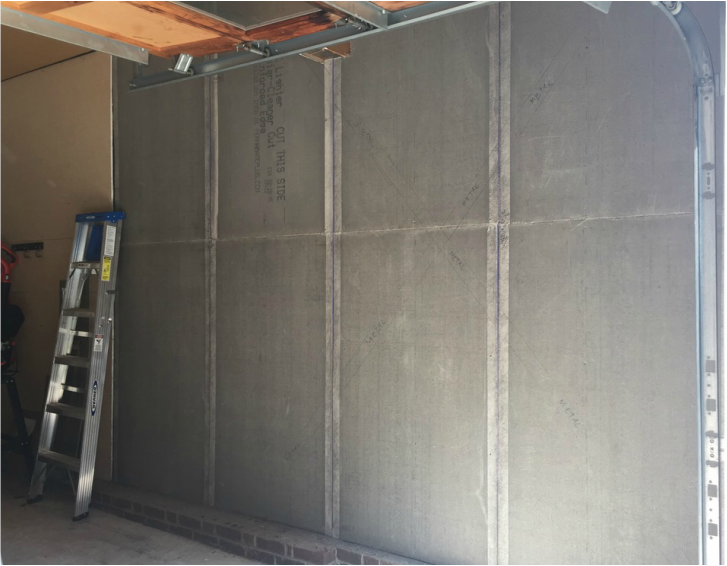
First layer secure!
I measured the spaces with a tape measure and used a pencil to draw cut lines on the cement boards. The boards have a specified side for cutting. It displays which side it is in big block letters. That side is easier to write on. I used a drywall knife to cut along the lines I drew.
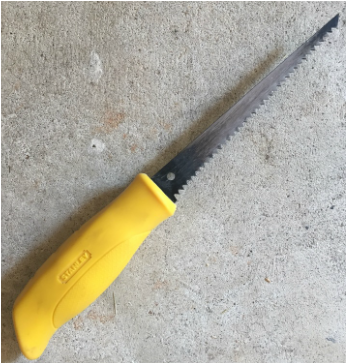
Drywall Knife
Once the boards were cut, we used the same process to install them. We needed a ladder for most of them because we were placing them above the already installed boards. This step is best suited for two people. The boards are very heavy, and ladders are not always reliable. Hubby had to do most of the heavy lifting. I did the cutting and measuring.
Once we finished the install on the one wall, we rounded the corner and finished off a small space between the wall and the garage door. Then I took lots of pictures. It looked better already!
Once we finished the install on the one wall, we rounded the corner and finished off a small space between the wall and the garage door. Then I took lots of pictures. It looked better already!
 Step 1 Complete! | 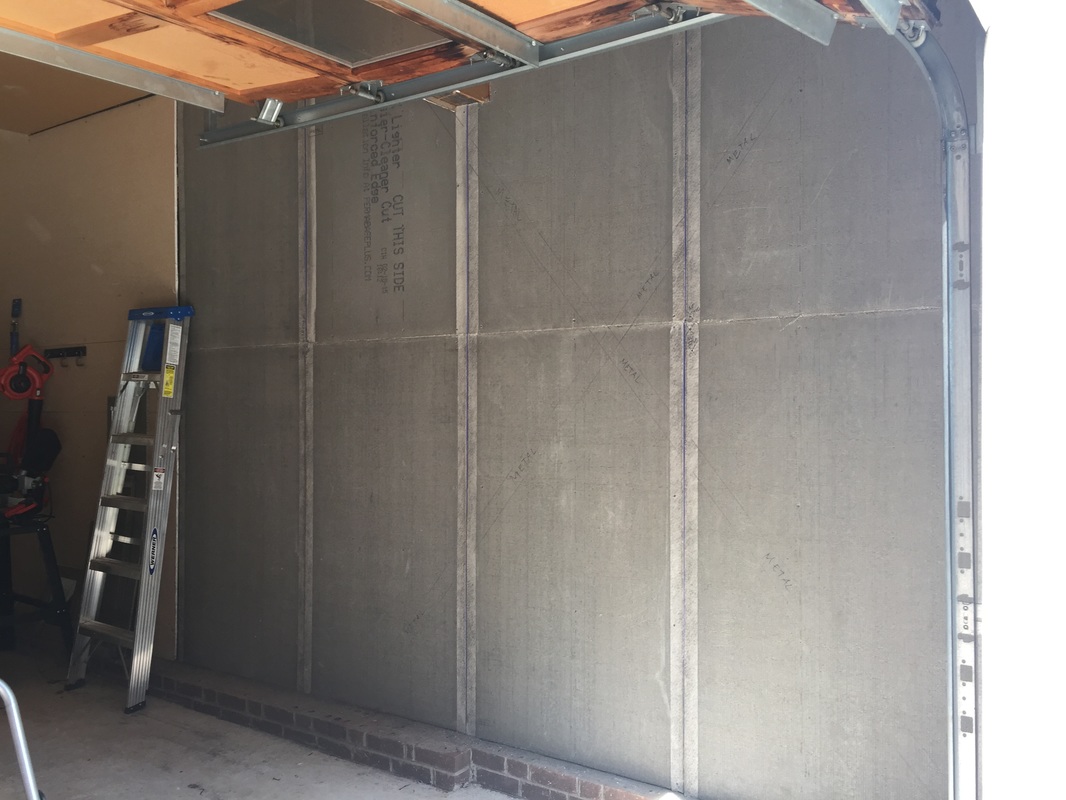 So much better! |
So our initial Step 1 turned into "Cement Board Installation". So now Step 2 will have to be "Drywall Installation".' And though I mentioned at the start of this post that the next few posts will be part of a mini-series, I am already thinking that Step 2 might not be complete by next week. I am going to have to rent a truck to purchase and transport the drywall to our garage, and we are out of town for part of this weekend. I'm already making excuses. Not promising...
Anyway, whenever I do get around to writing the next "Garage Makeover Series" post, it will be on the installation of drywall. In fact, just so I have a a record of it, I've provided a proposed list of steps for the complete garage makeover below. It might change as the process progresses, but at least you will get the idea.
Anyway, whenever I do get around to writing the next "Garage Makeover Series" post, it will be on the installation of drywall. In fact, just so I have a a record of it, I've provided a proposed list of steps for the complete garage makeover below. It might change as the process progresses, but at least you will get the idea.
Garage Makeover Series
Part 1 - Preparing for Drywall (Cement Board Installation)
Part 2 - Installing Drywall
Part 3 - Building Custom Shelves
Part 4 - Organizing Shelves
Part 5 - Installing Peg Boards
Part 6 - Organizing Peg Boards
Part 7 - Building a Work Bench
Part 8 - Installing an Outdoor Sink (I might need a professional for this)
As for the completion of Step 1, I have provided a list of materials I used for the process and a quick step recap.
| Materials List: Cement Boards (5' x 3') Cement Board Screws Power Drill Drywall Knife Tape Measure/Ruler Pencil and/or Sharpie Ladder Level | Quick Step Recap: 1. Measure your walls 2. Calculate the number of boards you'll need 3. Purchase your boards and other materials 4. Use drywall knife to cut boards down 5. Mark boards where studs are 6. Mark boards where any metal is 7. Install boards by securing screws to studs |
And of course, no makeover project is complete without the before and after shot...
 BEFORE | 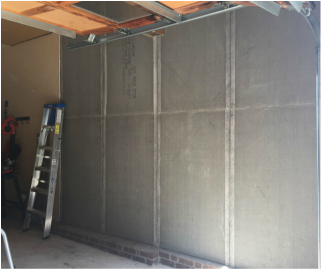 AFTER |

 RSS Feed
