It's been a while since my last post. Baby Eleanor was born at the beginning of January and I've been basking in the glow of motherhood. It's funny... I thought I would have more time to blog and work on small projects during my maternity leave. I had all these grand plans to overhaul my website and clean it up a little. NOT! People warned me that a newborn would take up all of my time, but I still assumed I would be able to take advantage of her naps. Not the case. In fact, I barely got through this paragraph without incident.
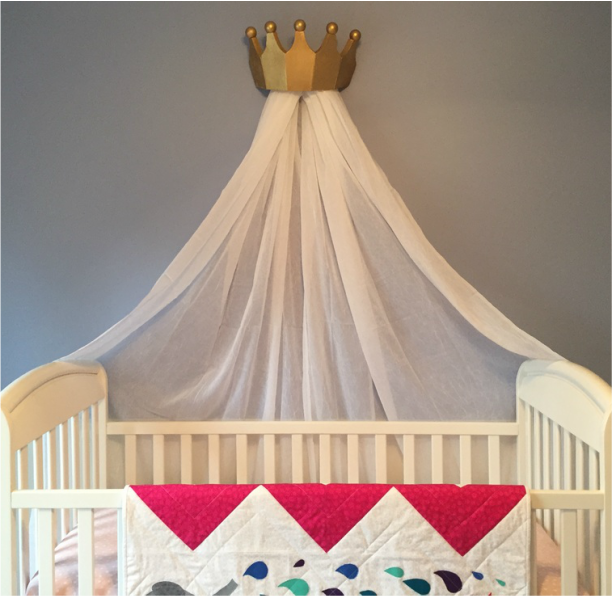
As for my next few posts, I am going to finish up the nursery projects. I managed to complete the room before baby was born so I have a few fun items to show for it. One of those items is the crown canopy.
I knew I wanted to do a crown canopy over the crib from the moment we found out we were having a girl. I specifically wanted to know the gender of the baby ahead of time so I could plan the nursery accordingly. I understand the appeal of the surprise, but it was not for me. My little girl's room is pinked out to the max. No "gender neutral" colors here.
I started my crown canopy search on Pinterest so I could get an idea of what I wanted. Then I branched out to Etsy, Amazon, etc. My plan was to purchase the crown to hang on the wall and then attach my choice of fabric. However, after a little research, the only thing I discovered was that the crowns were super expensive. I just was not willing to pay upwards of $80 for a decorative wall hanging. On to plan B. Make it myself!
Once I'd decided to make the crown myself, I had to start my research all over again. I actually found a vendor on Etsy that was selling wooden crowns. So I studied the pictures and came up with a plan for making one on my own. It probably wasn't the most efficient process, but as usual, a lot can be learned from my mistakes.
My materials list consisted of the following:
- Wood of Choice
- Primer Spray Paint
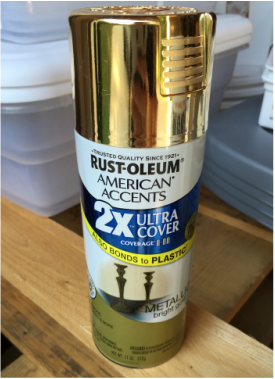
- Spray Paint (Gold)
- Wood Glue
- Wood Filler
- Caulk
- Nails
- Staple Gun
- Staples
- Small Wooden Rod
- Wooden Knobs
- Jig Saw
- Sander
- Drill
- Curtains
- Ribbon
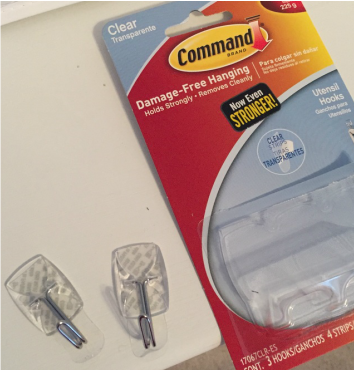
- Wall Hooks
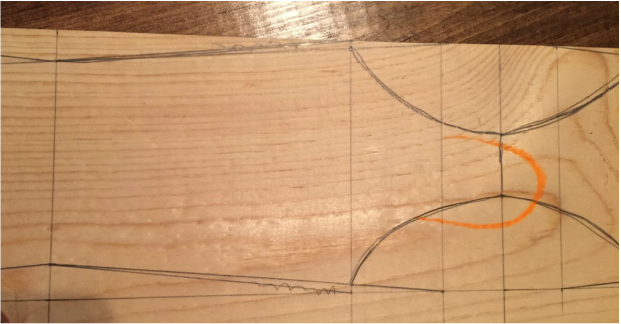
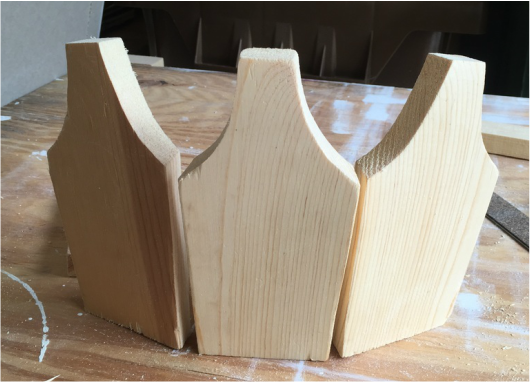
I started by drawing out the pieces I wanted to cut out of my wood. I drew them by hand using a ruler. Looking back, I realize it would have been easier to just draw out one piece on a sheet of paper, cut it out, and trace it onto the wood 5 times so all the pieces were uniformly sized. Hindsight is 20/20.
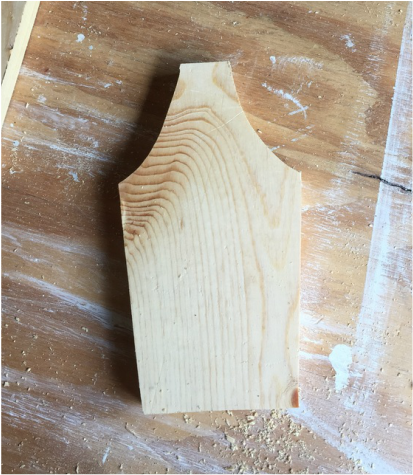
Once my parts were drawn, I used the jig saw to cut them out.
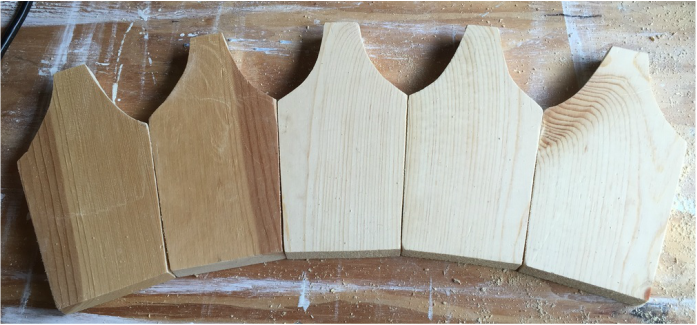
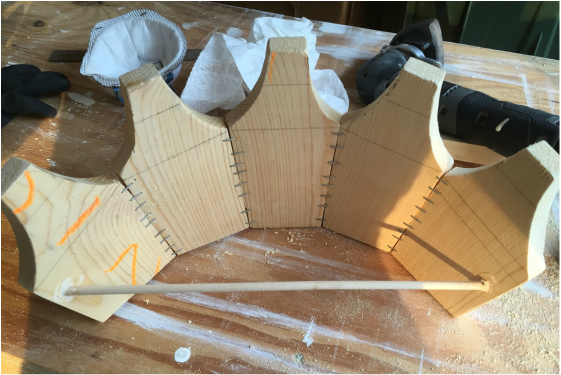
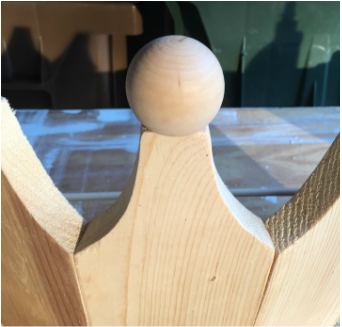
I assembled my cutouts to make sure they lined up correctly. This is the point at which I realized there was a lot more to this project than I'd initially anticipated. In order to get the curve of the crown that I wanted, I would have to angle the sides and bottom of every piece of wood. I'm not good enough with math to calculate those angles ahead of time. Also, I didn't really have the proper tools for the job. Or maybe I did but didn't know it. Either way, my method consisted of a lot of trial and error.
I used a combination of my jig saw and my sander to start shaving away the sides of my pieces in order to angle them. I can't really explain how I managed to do this. It took a lot of time and patience. I would love to know how the Etsy vendor does it, because there is no way my method is right.
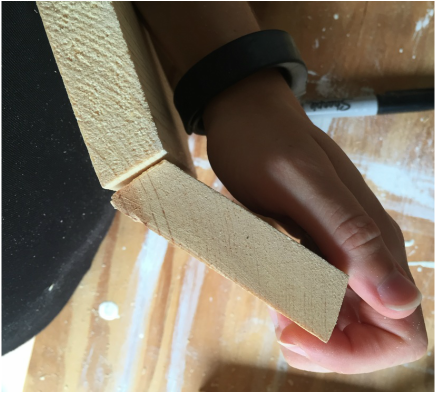
Once I'd angled the sides of the pieces, I did the bottoms as well. Again, trial and error was my method of choice. Even now, after the project has been completed, I have no suggestion for a better way to go about it. Woodworking is not my strongest skill. Sorry.
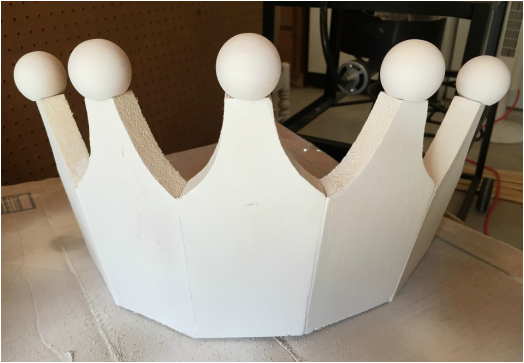
Once all my pieces were fitting together the way I wanted, I started the process of attaching them to one another. This is where my wood glue, staples, and staple gun came into play. I put a small line of wood glue between each piece, one at a time. I held them together long enough to dry so I could put a few staples on the inside of the crown as extra leverage.
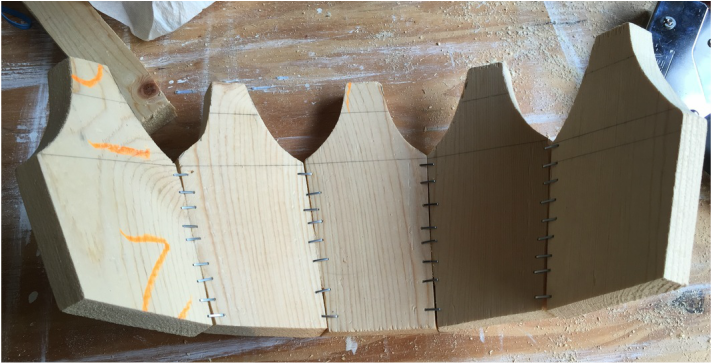
After the 5 pieces were assembled, glued, and stapled, I secured them from the inside. I drilled two small holes on the back side of each end of the crown. Then I used some wood glue to attach a small dowel rod into the holes for added support.
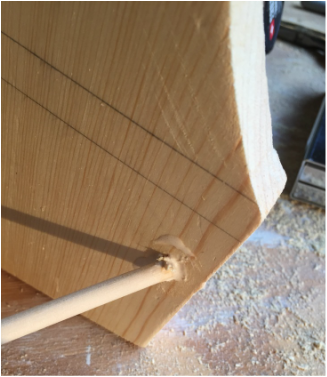
I pressed each side in to let the wood glue set.
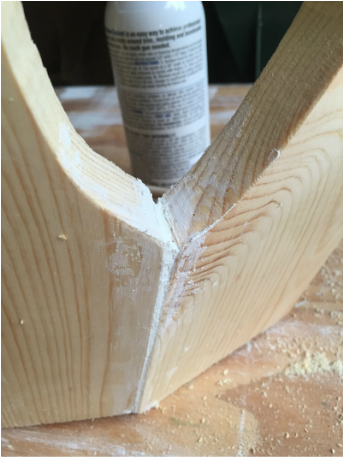
Once the base structure was secure, I started filling in the gaps in the wood. For the small cracks and holes, I used wood filler. For the larger seams on the front, I used the caulk, smoothing it out as I went along. I sanded everything once it was dry.
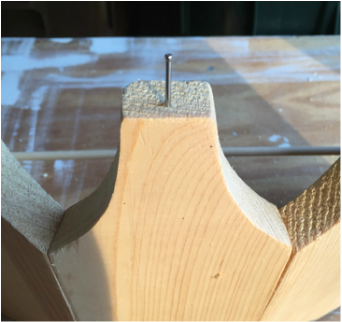
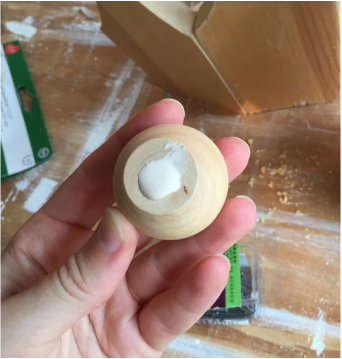
The next step was to add the wooden knobs to the top of each part. I did this by hammering in nails on the tops and using the wood glue to secure the knobs to the nails.
The knobs I purchased from Amazon already had small holes drilled into the bottom of them.
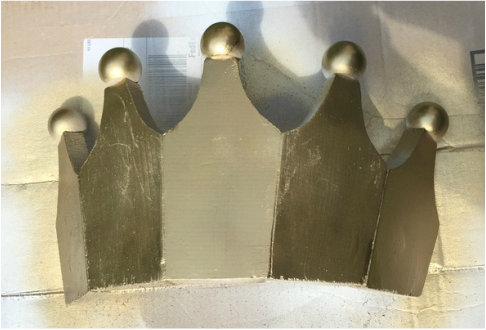
After all the assembly was done, I used a spray primer to give the whole project 2 layers.
I let the primer dry. Then I applied a few layers of metallic gold spray paint and let that dry as well.
The next step was adding the curtains. I went back and forth about what kind of fabric to attach to the crown. In the end, curtains made the most sense. They were cheap, easy, and already the size I needed. I chose a sheer fabric so they wouldn't draw too much focus away from the crown and the crib. I used two pieces of ribbon to tie the curtains to the rod on the back of the crown.
With the curtains attached to the rod, I figured out a method to attach the crown to the wall. At first, I was going to use claw hooks and nails, but I didn't think that would be safe enough to hang over a sleeping baby. Instead, I bought a few Command hooks. They were strong enough to hold the crown and they moved freely. That way, in the event that something snagged the curtains, the whole piece wouldn't come crashing down. It would give a little. Not that it will be a problem. Baby isn't sleep in the crib yet, and by the time she does, I will move the curtains away from the crib sides so she won't be able to grab them anyway.
With the curtains attached to the rod, I figured out a method to attach the crown to the wall. At first, I was going to use claw hooks and nails, but I didn't think that would be safe enough to hang over a sleeping baby. Instead, I bought a few Command hooks. They were strong enough to hold the crown and they moved freely. That way, in the event that something snagged the curtains, the whole piece wouldn't come crashing down. It would give a little. Not that it will be a problem. Baby isn't sleep in the crib yet, and by the time she does, I will move the curtains away from the crib sides so she won't be able to grab them anyway.
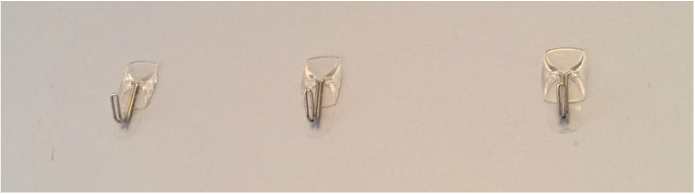
I attached the hooks to the wall in a row. The more the better.

I used some Scotch tape to attach the ends of the curtains to either side of the crib to give it the canopy look.
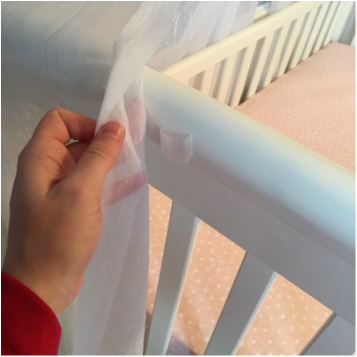
The result was exactly what I was going for at a fraction of the cost.

A crib fit for a princess. LOVE!
 RSS Feed
