Ok, so it's not exactly board and batten. It's more like faux board and batten. Which is almost better, because it's cheaper and easier. Who doesn't like being able to use those two adjectives when it comes to home projects?
I started working on the nursery a few weeks ago. We are transforming one of our small guest bedrooms into baby's bedroom. I started with a bunch of smaller projects. But after a while I realized that the small projects were just going to sit on the floor until I got around to the bigger projects. So last week I decided to take on the board and batten.
We painted the bedrooms blue a while back. They were horrible shades of bright kid colors when we moved in and it was one of the first things we changed. So when we found out we were expecting, I naturally thought about the nursery color and debated whether the shade was appropriate for either gender. Obviously blues are mainly associated with boys, but I decided to wait to make any decisions until we found out the gender. Of course, it's a girl. So I wrestled with the idea of changing the color, but I ultimately decided that the shade of blue we had was light enough to be girly.
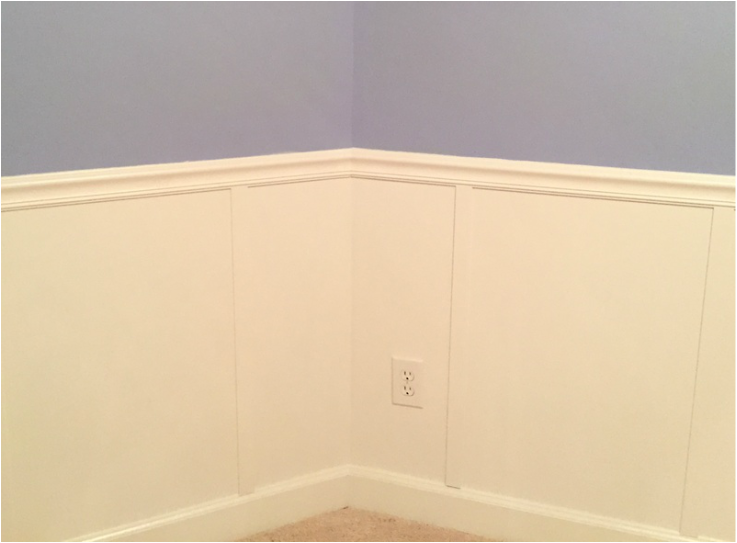
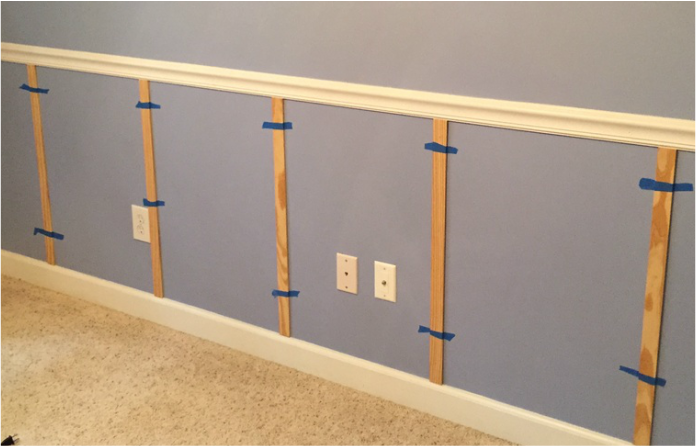
Then I had a stroke of genius. For some reason, this particular bedroom had a chair rail that went around the room. It is the only room in the house that has one so I found it a bit odd. Then I realized that I might be able to use it to my advantage. I'd seen a few tutorials on Pinterest for (faux) board and batten, and a lot of them used a chair rail. So since I already had one, I figured I would put it to good use. By adding some lattice boards to create my board and batten, I could essentially paint a fraction of the room, lighten it up, and decrease the amount of blue without painting the whole thing. So I did!
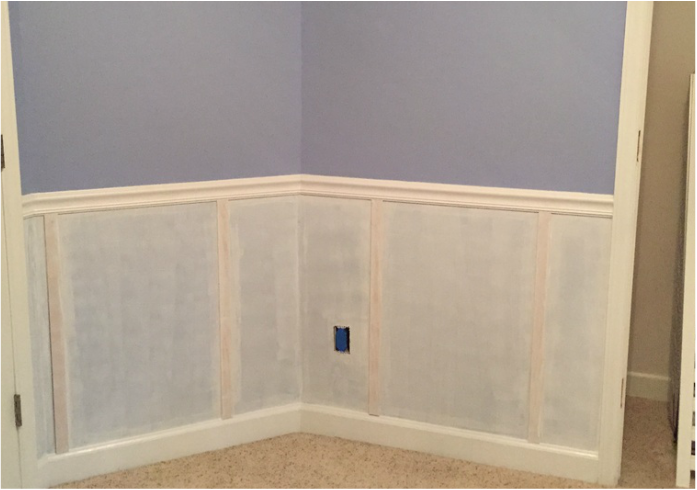
I started by measuring the space between the chair rail and my base boards. Then I drew out the walls of the room in my sketchbook to determine how to space the lattice strips. It took me a while to do the calculations so I would avoid the 8 different outlets in the room. Once I finished, I went to the hardware store for the appropriate amount of lattice boards. They sell them in a couple different lengths.
I started working on the nursery a few weeks ago. We are transforming one of our small guest bedrooms into baby's bedroom. I started with a bunch of smaller projects. But after a while I realized that the small projects were just going to sit on the floor until I got around to the bigger projects. So last week I decided to take on the board and batten.
We painted the bedrooms blue a while back. They were horrible shades of bright kid colors when we moved in and it was one of the first things we changed. So when we found out we were expecting, I naturally thought about the nursery color and debated whether the shade was appropriate for either gender. Obviously blues are mainly associated with boys, but I decided to wait to make any decisions until we found out the gender. Of course, it's a girl. So I wrestled with the idea of changing the color, but I ultimately decided that the shade of blue we had was light enough to be girly.
Then I had a stroke of genius. For some reason, this particular bedroom had a chair rail that went around the room. It is the only room in the house that has one so I found it a bit odd. Then I realized that I might be able to use it to my advantage. I'd seen a few tutorials on Pinterest for (faux) board and batten, and a lot of them used a chair rail. So since I already had one, I figured I would put it to good use. By adding some lattice boards to create my board and batten, I could essentially paint a fraction of the room, lighten it up, and decrease the amount of blue without painting the whole thing. So I did!
I started by measuring the space between the chair rail and my base boards. Then I drew out the walls of the room in my sketchbook to determine how to space the lattice strips. It took me a while to do the calculations so I would avoid the 8 different outlets in the room. Once I finished, I went to the hardware store for the appropriate amount of lattice boards. They sell them in a couple different lengths.
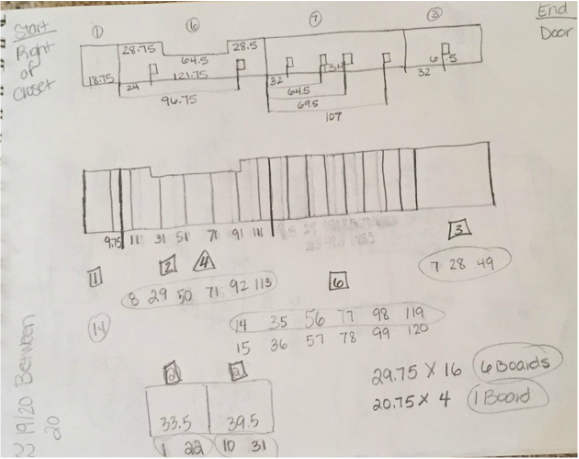
Probably looks like gibberish, but this is how my brain works
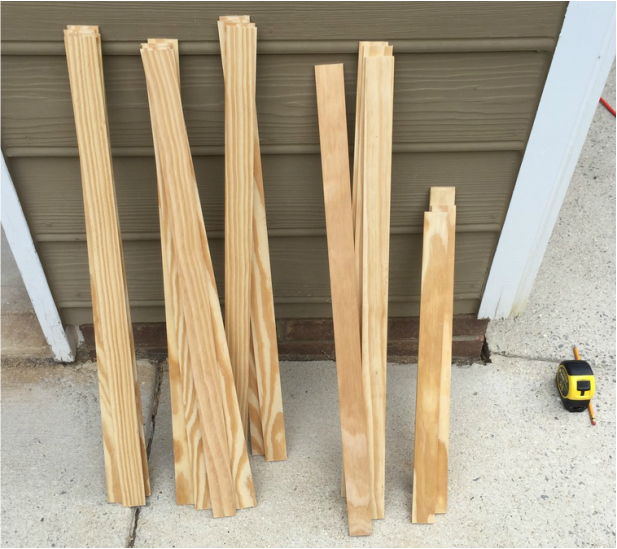
I used my miter saw to cut the boards down to the sizes I needed. The chair rail was not exactly even all the way around the room so I ended up making a few extra cuts than I originally anticipated. No way around that one.
Once I had my cuts, I placed the boards in their designated measured places along the wall and made sure they were going to fit. This is when I had to make most of my adjustments. It took some time, but I managed to fit them all in.
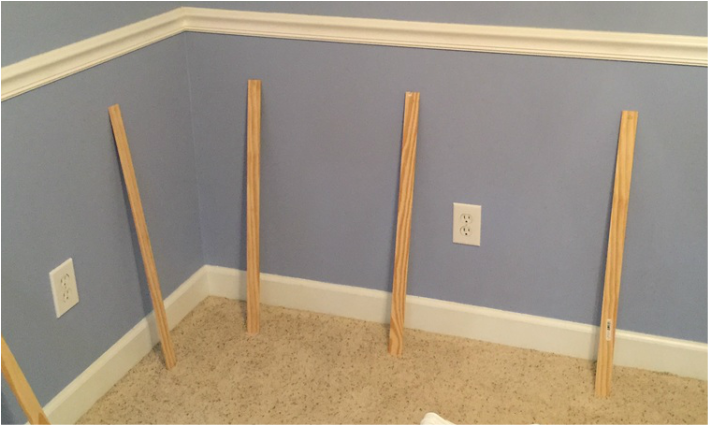
I used painters tape to tape them all up on the wall. I wanted to make sure everything looked right before I started installing them.
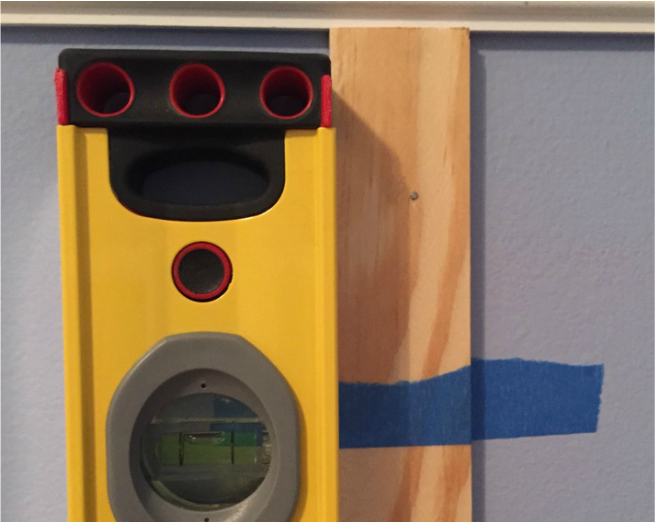
Once I was satisfied with the placement of the boards, I started the installation. I used a level to ensure that each board was straight and I used a hammer and pin nails to put them all in place. This would have been a good place to use a nail gun, but I don't own one and I didn't care to purchase one just for this project.
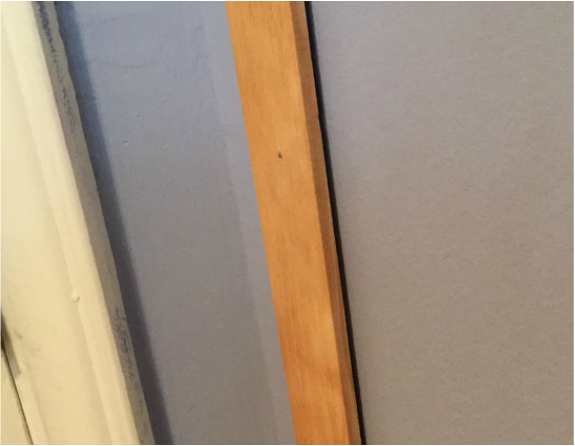
I used three nails in each board to secure the top middle and bottom. Since I didn't have the power of the nail gun or security of any glue, some of the boards were separated from the wall with little gaps.
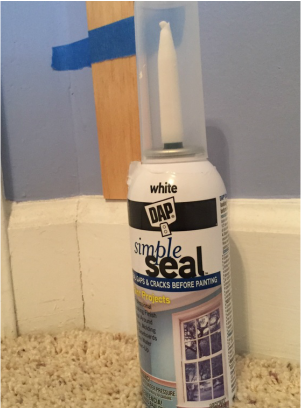
I filled the gaps with a sealer I got from a friend. I sprayed the sealer and used a drywall scraper to get rid of the excess gunk. I spread the sealer over any imperfections in the wall and wood as well. Then I let it dry for a few hours.

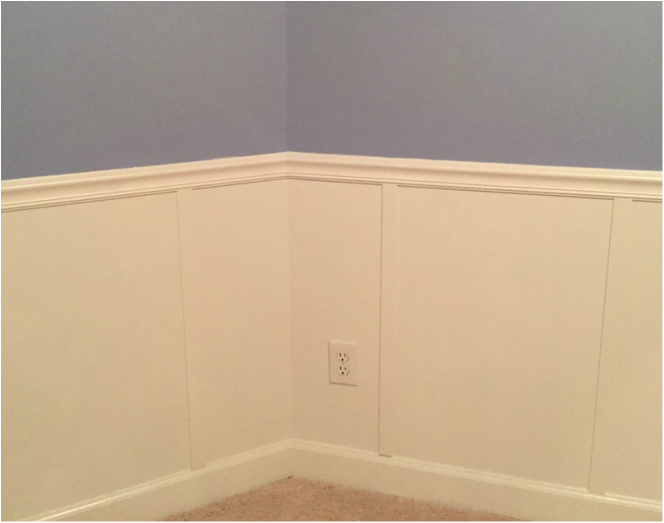
Once everything was dry I removed all the outlet covers and put some painters tape over the outlets to protect them. Then I started painting. I used a small brush to get into all the cracks and corners and a roller brush to do everything in between. I didn't prime anything. I just used regular white latex paint. A layer of primer probably would have done some good, but I didn't want those fumes in my house so close to myself and baby. I ended up needing 4 layers of white paint to cover the blue of the walls.
One layer down, three to go
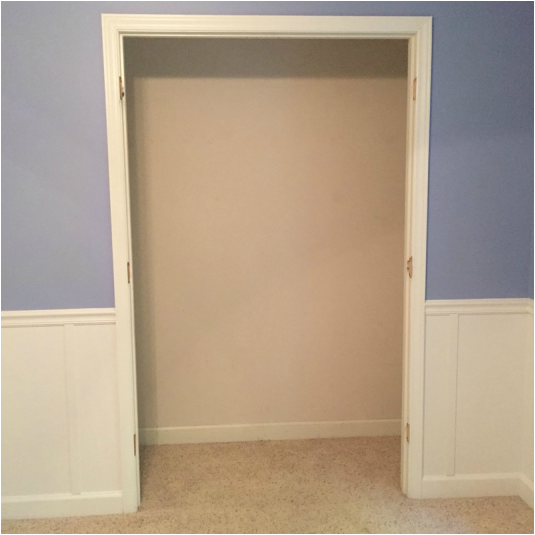
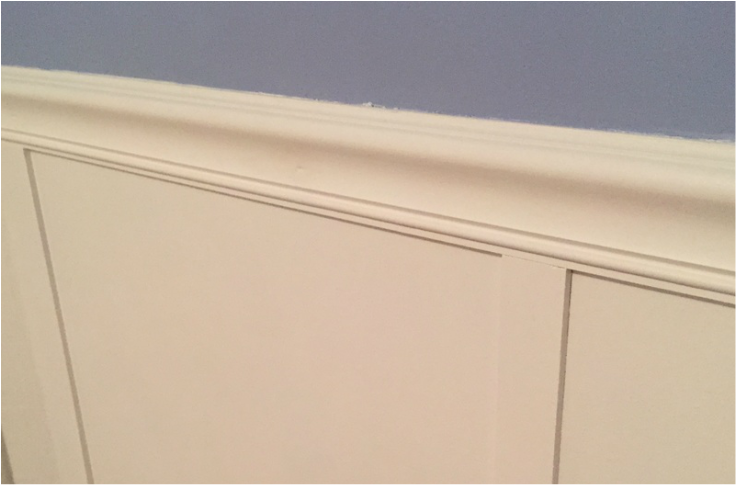
Once I finished all 4 layers, I let everything dry and put the outlet covers back on. Then I took a bunch of pictures. I loved it! It had exactly the desired effect I was looking for. It lightened up the room and made the blue look even less significant.
Now all I need to do is finish all my nursery furniture. Then I can finally start displaying all the adorable small decorations I've been working on. There is one other big project that needs to be completed, and that is the baby's closet. Right now it is a clean slate in need of a good paint job and some serious shelving (future blog post). But luckily that is something that will not affect the decorating of the rest of the room. Hooray!
This project was somewhat time-consuming, but not hard, and it made a huge difference in a small room. I suggest using this method if you are looking for a way to class up a room without painting it all one color. I've seen a lot of people use it for hallways, bathrooms, and accent walls. I can guarantee that this will not be the only spot with board and batten in my house in the future. I can already think of at least two other places to put it. Stay tuned for that!
 RSS Feed
