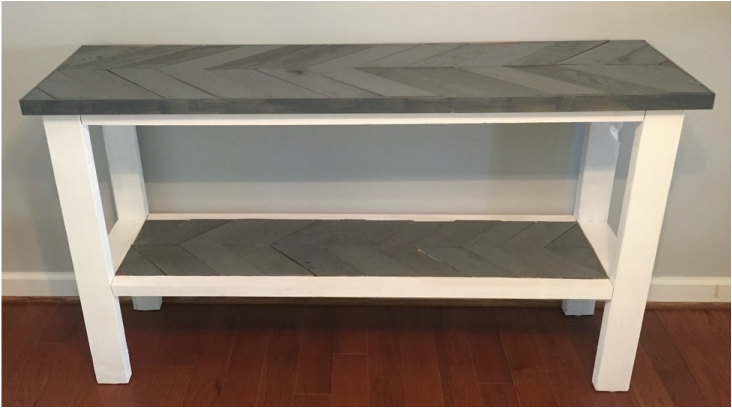
You might remember that at the end of my Coffee Table Post I had a sneak peek of the buffet table that I was making from scratch. Well, it's FINALLY done! Almost three months later.
The last few months have been a crazy time for me. Now that the cat's out of the bag I can finally say that my husband and I are expecting our first child. So the past 12 weeks have been nothing but morning sickness and paranoia. Absolutely no time for big house projects. Add the fact that it's been averaging in the high 90s here in Raleigh for the last few weeks. Not a great combination for any DIYer. So I've mainly stuck to the smaller, indoor projects that don't involve fumes or heat. But now the first trimester is over and I feel like a whole new person. So I traded in my daily nap for some outdoor productiveness. Now all I need is the heat to dissipate and I will be golden.
This particular project was inspired by the coffee table I made from plans provided by Ana White. But unlike the coffee table, I built the buffet table without any plans. It was all in my head. In fact, I didn't even bother drawing out the piece before I built it. Something I regret. I did manage to draw everything out after the fact so I could provide my plans to anyone who wants to try something similar.
I will attempt to list my materials and process below with dimension drawings. Forgive my ramblings. I want to make sure I point out my mistakes along the way so that you might learn from them. Here we go!
| Materials List: Wood (See Cut List) #8 x 2 1/2" Wood Screws #8 x 1 1/4" Wood Screws Small Pin Nails Kreg Jig Clamps Paint Brushes Paint of Choice Stain of Choice Polyurethane Power Drill Hammer Miter Saw Tape Measure Wood Filler Sander/Sand Paper Wood Glue | Cut List: (4) 2 x 4 x 33" (Legs) (4) 2 x 4 x 11" (Shelf Sides) (4) 2 x 2 x 51" (Shelf Front/Back) (2) 2 x 1/2 x 61" (Tabletop Trim Front/Back) (2) 2 x 1/2" x 16" (Tabletop Trim Sides) (1) 60 1/2 x 16 x 3/4" (Tabletop) (1) 51 x 11 x 3/4" (Bottom Shelf) Pallet Planks (These should be cut separately during the process to ensure accuracy - use miter saw to get 45 degree angles) *** NOTE: I listed the cut widths and depths according to how you would purchase them at a store. The actual sizes usually run 1/2 an inch shorter. See my dimensions drawings. (Example: A 2x4 actually measures 1 1/2 x 3 1/2) |
Step-By-Step Process
| Step 1: Gather your materials. I always try to use wood that I already own as opposed to buying it new. I managed to build most of this project from old wood I had in the garage. The only thing I had to purchase was the trim for the tabletop portion and more stain when I ran out of what I had. Step 2: If you haven't already, cut your wood and start lining up the base of the table. Here you will see all 4 legs (2 x 4 x 33) with the supporting beams (2 x 2 x 51). | 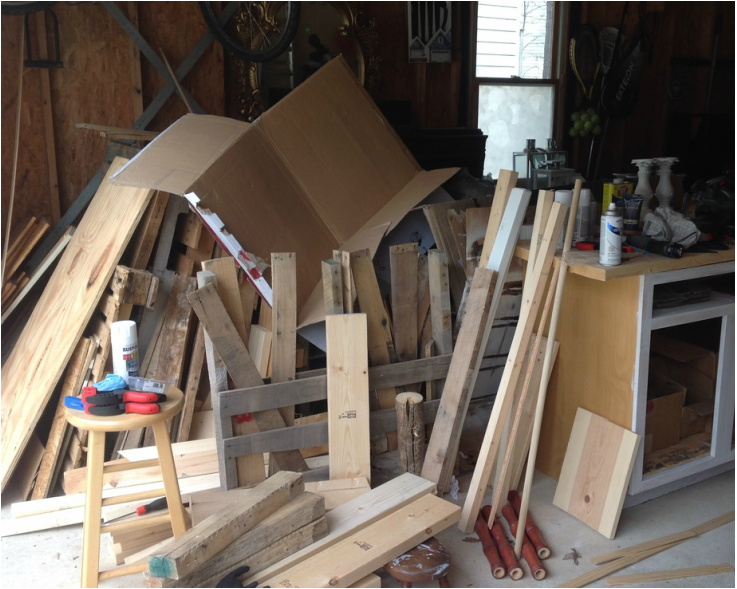  |
| Step 3: Attach your base pieces together. Drill holes with your Kreg Jig on the sides of the supporting beams that won't be exposed. I did mine on the top. I used a Mini Kreg Jig I bought from Amazon for a reasonable price. It came with great instructions. Use the #8 x 2 1/2 inch wood screws. | 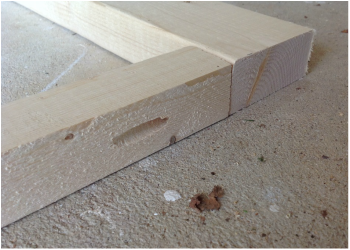 |
| Step 4: Start attaching the sides (2 x 4 x 11) to your front and back. You will do this for the top of your base and for the bottom shelf. The shelf height is up to you. Mine measures 13 1/2 inches from the floor to the top of the shelf. That is not depicted in my dimensions drawing. Use the Kreg Jig again to drill the holes. Use the smaller wood screws.. | 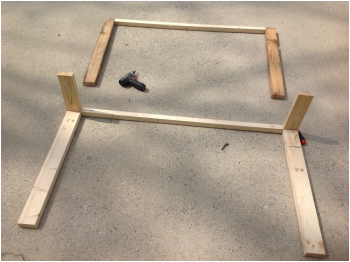 |
| Step 5: Set your base upright so you can add the other two bottom shelf supports (2 x 2 x 51). This step could also be done during Step 3 when you did the top ones. That might actually be easier. I just forgot at the time. | 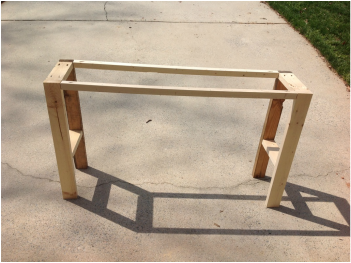 |
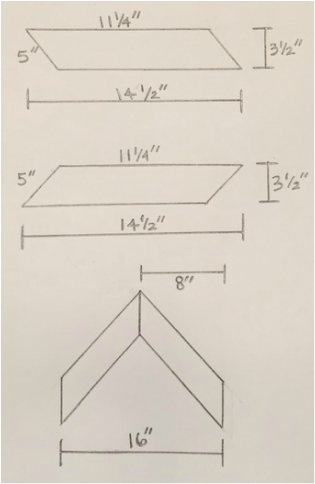
| Step 6: Begin constructing your herringbone tabletop. I started by cutting the pallet planks at 45 degree angles with my miter saw and placing them in the pattern I wanted. | 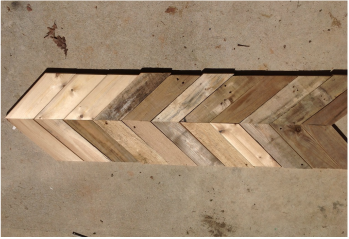 |
| Step 7: Use your largest piece of wood (60 1/2 x 16 x 3/4) to support your herringbone pieces. I cut this out of a large board that I had in my garage. | 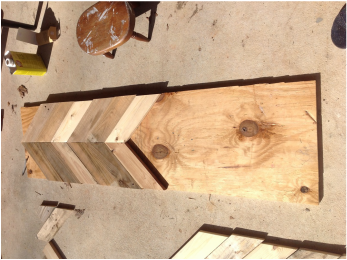 |
| Step 8: Use the wood glue to start gluing your pieces onto the wood. Place something heavy on each piece while it dries. My suggestion is to make sure each piece lines up on the edges perfectly before gluing. I made the mistake of gluing first and spent WAY too much time sanding the edges after the fact. | 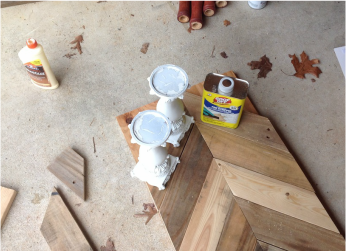 |
| Step 9: Use your paintbrush and stain to put a coat of stain on your tabletop. I chose a weathered gray to match the bookshelf in my dining room from my Bookshelf Makeover Post. | 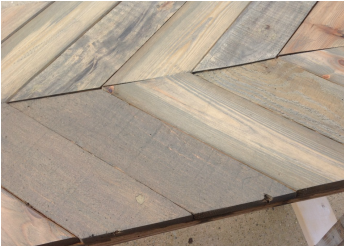 |
| Step 10: Repeat Steps 6-9 on a smaller scale for your bottom shelf. Use the other large piece of wood (51 x 11 x 3/4). Cut your pallet planks to fit onto the wood slat and glue them down. I suggest making sure your wood slat fits into the allotted space before gluing. Otherwise, a lot of sanding will be required. | 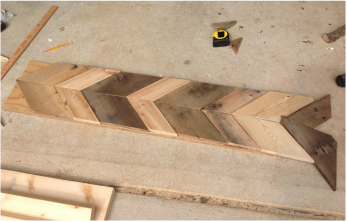 |
| Step 11: Stain your herringbone bottom shelf with a layer of stain and put another layer on your tabletop as well. Wait a few hours and do the second coat on your bottom shelf. | 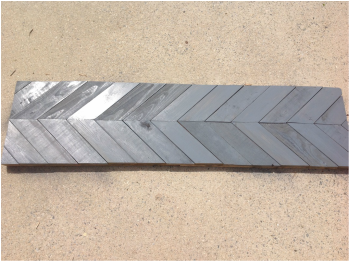 |
| Step 12: Fill all your Kreg Jig holes with wood filler and allow to set. Sand down the parts where the filler was used to get a clean look. I failed to take a picture of this part of the process, but here is another lovely picture of my Kreg Jig holes for your enjoyment. |  |
| Step 13: Paint your base the color that you want. I chose white to go with my gray stain. I painted two layers of primer and one layer of paint. I didn't want it to look too shiny. I was going for a more rustic look since most of the wood I used was pretty beat up. | 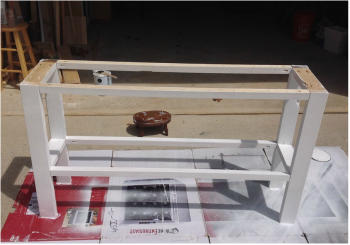 |
| Step 14: Add the trim to your tabletop. Use small pin nails to nail in the sides first (2 x 1/2 x 16). Then nail on the front and the back (2 x 1/2 x 61). Stain the trim to match the rest of the tabletop. I also failed to take pictures of this part of the process, but this is a picture of what the final result should look like. | 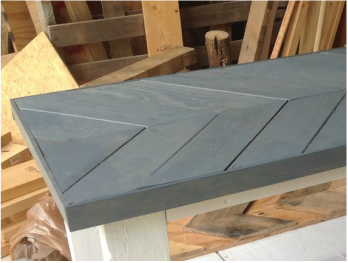 |
| Step 15: Use your Kreg Jig to drill holes in the bottom of the bottom shelf. Once the holes are drilled, insert the shelf into the empty space and drill your #8 x 1 1/4 inch wood screws into the 2 x 2s on the sides, front, and back. Again, missing picture, but here is a photo of the bottom shelf after it has been screwed in. | 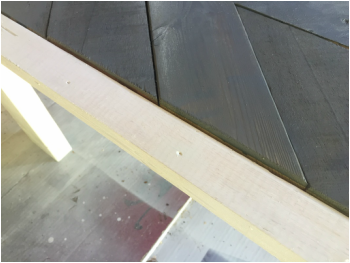 |
| Step 16: Place your tabletop onto your base in the position that you want it. Use some large clamps to hold the tabletop in place. You could also flip the tabletop and the base upside down. | 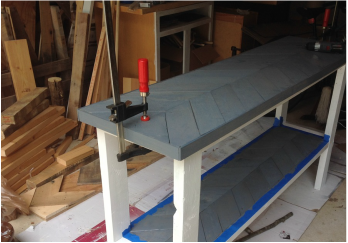 |
| Step 17: Use your power drill to pre-drill some holes on the underside of your 2 x 4s and 2 x 2s that are supporting your tabletop. I did four on the front, four on the back, and two on each side. |  |
| Step 18: Screw your #8 x 2 1/2 wood screws into the pre-drilled holes to secure the tabletop. | 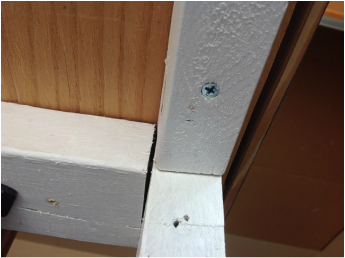 |
| Step 19: Stain your tabletop and bottom shelf with a layer of polyurethane and wait 24 hours to use the surface. You can do as many layers as you want to get your desired look. | 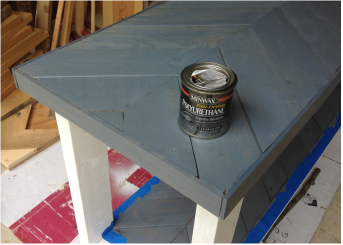 |
| Step 20: Place your new piece of furniture in the house! | 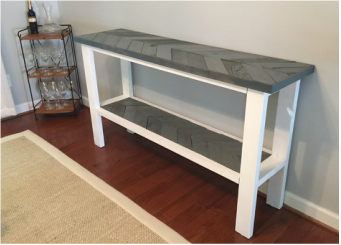 |
| Step 21: Decorate! | 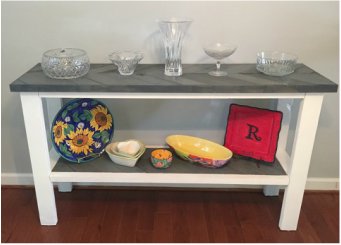 |
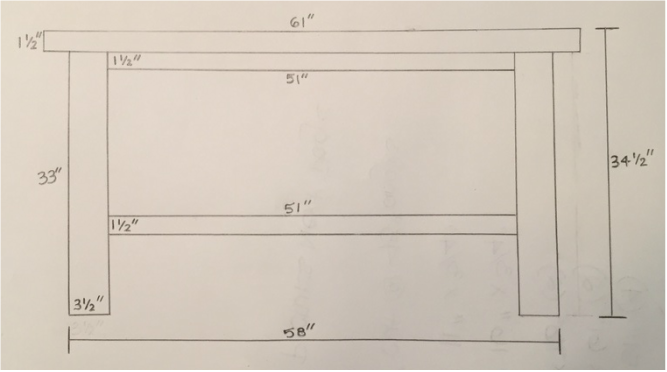
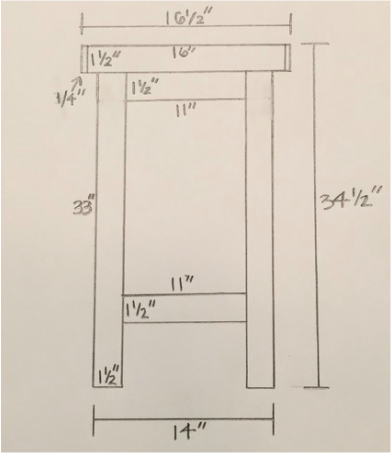
Below are the dimension pictures that I drew of the project after I completed it. These might make it a little easier to understand. The picture is not to scale, but the measurements are exactly what my table measurements are. I did not use the cut list dimensions like what you would buy from the hardware store. I used the actual dimensions.
FRONT VIEW
SIDE VIEW
TOP VIEW
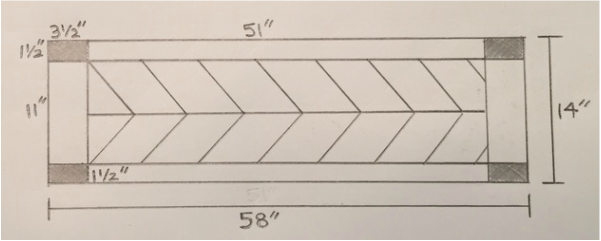
BOTTOM SHELF (VIEW FROM TOP)
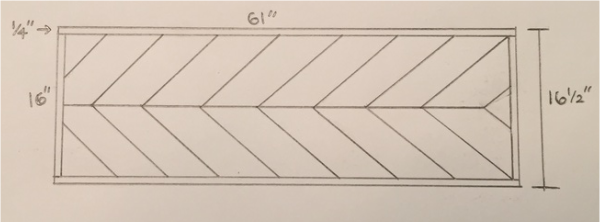
HERRINGBONE (TABLETOP)
Measurements are approximates - you are better off measuring the herringbone as you go
HERRINGBONE (BOTTOM SHELF)
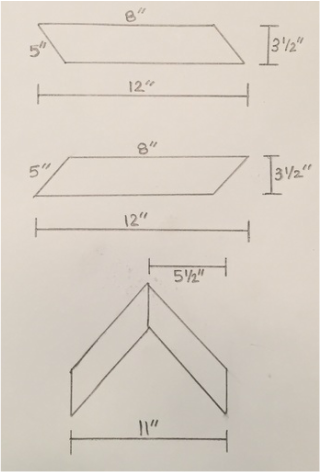
Measurements are approximates - you are better off measuring the herringbone as you go
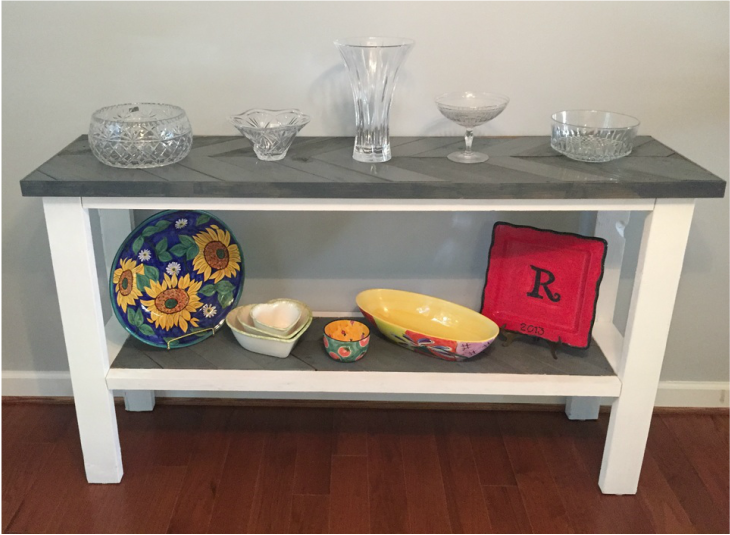
Finally a place for me to put all the crystal we got as wedding gifts. And a whole shelf for all those cute plates and bowls that are just too pretty to ever use but were taking up valuable storage space in the basement. It is exactly what I needed, and matched my bookshelf perfectly. SUCCESS!
Here's what it looks like in my dining room with the rest of the furniture. Almost everything in this room is made or made over. The bookshelf and sign were makeovers. The table and chairs were makeovers. The table centerpiece is the bouquet I made for my wedding, and the buffet table is built from scratch!
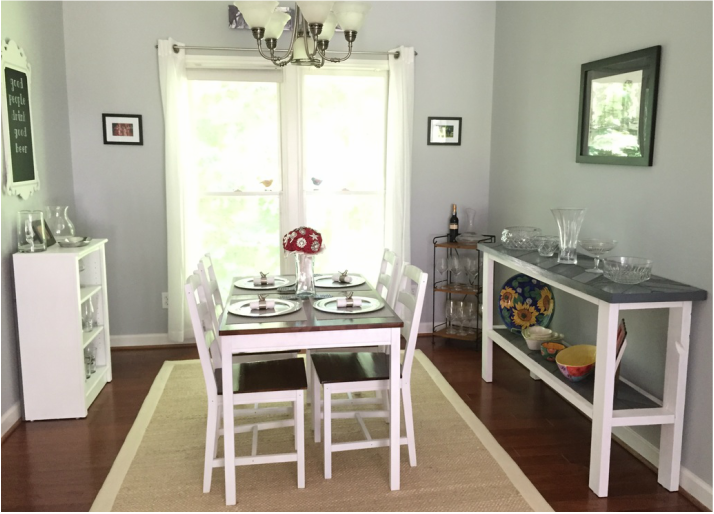
My DIY Dining Room
The Ultimate Dining Room Transformation
| BEFORE 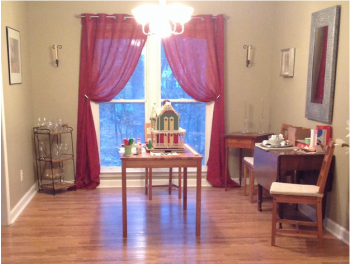 This is the only picture I could find of my dining room before. I always forget the "Before" photos. This was last November when I was working on my Gingerbread House Competition Entry (Future Blog Post). | AFTER 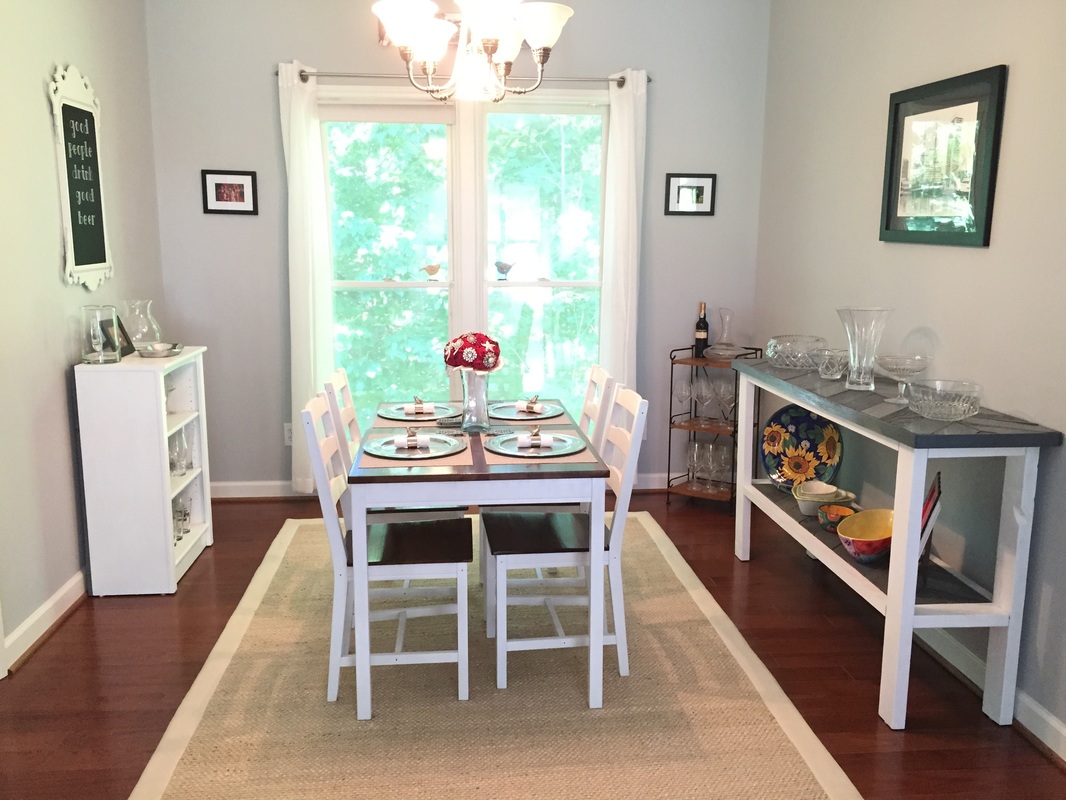 I love my new dining room even more when I compare pictures. New wall color, new hardwoods, and a lot of DIY love in this photo. It's just so much brighter and inviting in there. |
 RSS Feed
