Shortly after I discovered fondant and started making cakes on a regular basis, I came across a Pinterest post about cake balls. Cake... in a ball... covered in chocolate? Woah.
I was intrigued by the idea of being able to eat cake without having to decorate it, cut it, or even clean up after it. I had to try it.
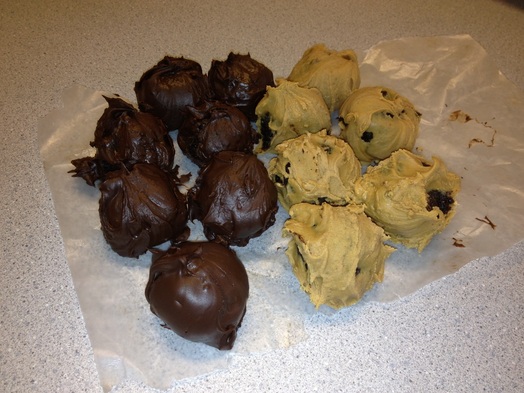
The more I researched cake balls, the more I realized how many methods there were out there for making them. I decided to go with the most traditional route I could find. Since I wasn't going to be able to take awesome pictures and show off my skills, these babies needed to speak for themselves. And since I was going for taste, I disregarded aesthetics altogether (as evidenced by my photo).
Most people I know would be happy with the triple chocolate whammy (chocolate cake, chocolate icing, chocolate cover). I, however, am not a huge fan of JUST chocolate. I know… it’s baffling. So I decided to make half a batch of triple chocolate whammies, and half a batch of double chocolate peanut butter fancies. I prefer my chocolate mixed with another flavor, and peanut butter is always a winner.
WARNING: Below I have listed the steps I used to make my first cake balls. I have since adjusted my process and streamlined it to be easier and faster. So I am not recommending this particular set of instructions. This is just for information purposes.
Step 1: I baked a chocolate sheet cake with the ingredients and instructions from a box.
Step 2: I used a regular can of chocolate icing from the store and put it in a big bowl.
Step 3: I mixed the cake and the icing together with my hands and rolled out little balls. SO MESSY!
Step 4: I froze the balls for a few hours.
Step 5: I melted chocolate chips (and then peanut butter chips) in a bowl over a pot of boiling water.
Step 6: I dipped half of the frozen cake balls into the melted chocolate, rolled them around a little, and spooned them out.
Step 7: I dipped the other half of the frozen cake balls into melted peanut butter chips, rolled them around a little, and spooned them out.
Step 8: I let all the balls set and harden on wax paper.
Step 9: I ate the majority of the cake balls and fed the rest to my coworkers.
They were amazing!!!! I can say that because it was not my recipe… In fact, it wasn't much of a recipe at all. All I did was bake a boxed cake, cover it in canned icing, and dip it in melted chocolate. Of course, no one needed to know that at the time.
As I mentioned before, I have since modified my process for making cake balls. However, I must note that they have never tasted quite as delicious as that first time. But despite my seemingly easy instructions, the entire process was a MESS. There was too much icing, which caused the balls to be misshapen and hard to handle (no way around that wording…). Even after freezing them for a few hours, when they were added to the melted chocolate, they started falling apart and using a spoon was actually the only way to get them out of the bowl.
Using less icing actually allows the cake to be shaped better, frozen faster, and dipped cleaner. It doesn't give them quite as much of the “melt in your mouth” quality, but chocolate is still chocolate, and cake is still cake, right? I also use candy melts now instead of chocolate chips, and I have an electric melter instead of my bowl over boiling pot setup. Now I can bust out 200 hundred cake balls in a matter of 2 days. Which is exactly what I have to do every year...
I started bringing cake balls to every party I went to, and now it’s what everyone wants for Christmas. No complaints here. Sure beats trying to come up with gift ideas for members of two different families.
Here are the instructions for how I make my cake balls now if you are interested in trying it for yourself:
Step 1: Bake a boxed cake.
Step 2: Spread half a tin of canned icing on cooled cake.
Step 3: Mix cake and icing together with hands and roll into balls.
Step 4: Freeze or refrigerate balls for a few hours.
Step 5: Melt candy melts or chocolate chips in an electric melter or double boiler.
Step 6: Dip balls halfway in melted chocolate and set on wax paper to dry for at least an hour.
Step 7: Grip the dipped side of the balls, dip the other side, and set on wax paper to dry.
Step 8: EAT!
Here is a picture of some more recent cake balls. Notice they are much prettier. My photography skills have improved as well.
I was intrigued by the idea of being able to eat cake without having to decorate it, cut it, or even clean up after it. I had to try it.
The more I researched cake balls, the more I realized how many methods there were out there for making them. I decided to go with the most traditional route I could find. Since I wasn't going to be able to take awesome pictures and show off my skills, these babies needed to speak for themselves. And since I was going for taste, I disregarded aesthetics altogether (as evidenced by my photo).
Most people I know would be happy with the triple chocolate whammy (chocolate cake, chocolate icing, chocolate cover). I, however, am not a huge fan of JUST chocolate. I know… it’s baffling. So I decided to make half a batch of triple chocolate whammies, and half a batch of double chocolate peanut butter fancies. I prefer my chocolate mixed with another flavor, and peanut butter is always a winner.
WARNING: Below I have listed the steps I used to make my first cake balls. I have since adjusted my process and streamlined it to be easier and faster. So I am not recommending this particular set of instructions. This is just for information purposes.
Step 1: I baked a chocolate sheet cake with the ingredients and instructions from a box.
Step 2: I used a regular can of chocolate icing from the store and put it in a big bowl.
Step 3: I mixed the cake and the icing together with my hands and rolled out little balls. SO MESSY!
Step 4: I froze the balls for a few hours.
Step 5: I melted chocolate chips (and then peanut butter chips) in a bowl over a pot of boiling water.
Step 6: I dipped half of the frozen cake balls into the melted chocolate, rolled them around a little, and spooned them out.
Step 7: I dipped the other half of the frozen cake balls into melted peanut butter chips, rolled them around a little, and spooned them out.
Step 8: I let all the balls set and harden on wax paper.
Step 9: I ate the majority of the cake balls and fed the rest to my coworkers.
They were amazing!!!! I can say that because it was not my recipe… In fact, it wasn't much of a recipe at all. All I did was bake a boxed cake, cover it in canned icing, and dip it in melted chocolate. Of course, no one needed to know that at the time.
As I mentioned before, I have since modified my process for making cake balls. However, I must note that they have never tasted quite as delicious as that first time. But despite my seemingly easy instructions, the entire process was a MESS. There was too much icing, which caused the balls to be misshapen and hard to handle (no way around that wording…). Even after freezing them for a few hours, when they were added to the melted chocolate, they started falling apart and using a spoon was actually the only way to get them out of the bowl.
Using less icing actually allows the cake to be shaped better, frozen faster, and dipped cleaner. It doesn't give them quite as much of the “melt in your mouth” quality, but chocolate is still chocolate, and cake is still cake, right? I also use candy melts now instead of chocolate chips, and I have an electric melter instead of my bowl over boiling pot setup. Now I can bust out 200 hundred cake balls in a matter of 2 days. Which is exactly what I have to do every year...
I started bringing cake balls to every party I went to, and now it’s what everyone wants for Christmas. No complaints here. Sure beats trying to come up with gift ideas for members of two different families.
Here are the instructions for how I make my cake balls now if you are interested in trying it for yourself:
Step 1: Bake a boxed cake.
Step 2: Spread half a tin of canned icing on cooled cake.
Step 3: Mix cake and icing together with hands and roll into balls.
Step 4: Freeze or refrigerate balls for a few hours.
Step 5: Melt candy melts or chocolate chips in an electric melter or double boiler.
Step 6: Dip balls halfway in melted chocolate and set on wax paper to dry for at least an hour.
Step 7: Grip the dipped side of the balls, dip the other side, and set on wax paper to dry.
Step 8: EAT!
Here is a picture of some more recent cake balls. Notice they are much prettier. My photography skills have improved as well.
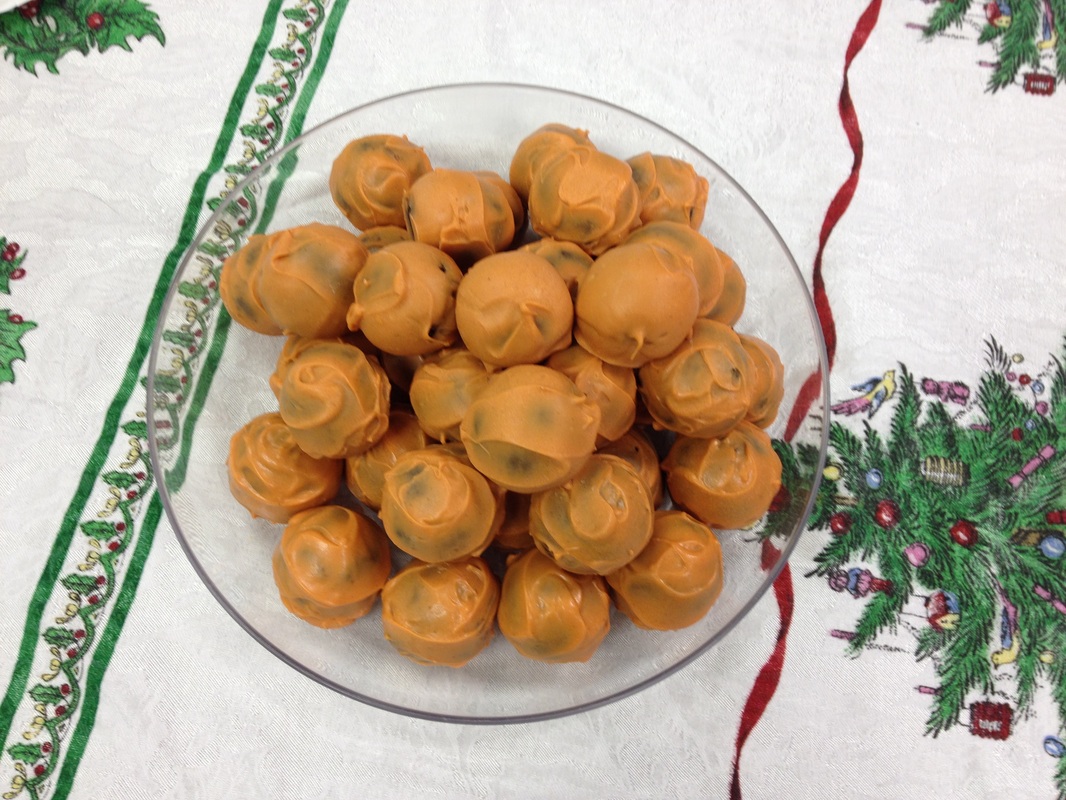
Chocolate cake with chocolate icing dipped in pumpkin-spiced Candy Melts
 RSS Feed
