This week's post is about Halloween decor! It's October!!! Since I missed my weekly post last week because of technical problems, I've decided to post a few different DIY projects this week
Halloween is a great holiday. You get to dress up in costumes and pretend to be whoever or whatever you want. You get to eat as much candy as you want without people judging you. AND, you can decorate the house with stuff that would not be appropriate in most any other season.
Halloween is a great holiday. You get to dress up in costumes and pretend to be whoever or whatever you want. You get to eat as much candy as you want without people judging you. AND, you can decorate the house with stuff that would not be appropriate in most any other season.
Since Halloween is just one day, decorating for it can be challenging. I can't really justify putting up fake cobwebs and plastic eyeballs in September. And I can't leave my decorations up during November when there is another holiday that month that requires a whole different set of decor. Luckily, my "Fall Decor" is subdued enough to last September through November. I can thank pumpkins for that! I just get to add a bunch of extras for October. Woohoo!
With that said, let's get started! Below is a list of tips for decorating your house for Halloween.
Halloween Decorating Tips:
- Candy Corn - Using candy corn is one of the easiest ways to decorate for Halloween. I use bags of it to fill up my empty vases and bowls around the house. It's a great filler for pretty much anything, and it actually stays edible for long periods of time. I generally buy myself an extra bag that I can snack on, but I've often caught my brother eating out of my centerpieces.
- Black and Orange Ribbon - Most fall decor involves oranges and browns and burlaps. Instead of changing everything for Halloween, I just add some black ribbon to my already existing decor. Sometimes I make black ribbon roses or black origami flowers to give centerpieces a darker look. I wrap the bottoms of my candles in a thin orange or black ribbon to add a pop of color. For my tree branches, I cut little pieces of black ribbon to wrap around the branches to make them look like little bats.
- Craft Paper - A lot of times craft stores will have deals on Halloween-themed craft paper. After all, there is only a small window of time during the year when this type of craft can be used. I will usually stock up on these items in November when they are selling at a steep discount and use them the next season. I make origami flowers. This year I made a black and orange flag banner for the fireplace mantle.
- Pumpkins - This one may seem a little obvious, but it is still worth mentioning. Starting in September, stores start selling pumpkin EVERYTHING! I like to stock up on small, cheap plastic pumpkins from the dollar store, etc. It's amazing what one pumpkin can do for the decor in a room. A little black paint can turn a regular plastic pumpkin into a scary Jack-O-Lantern for Halloween. Leave one side blank for September and November, but turn it around to show the scary side for the month of October!
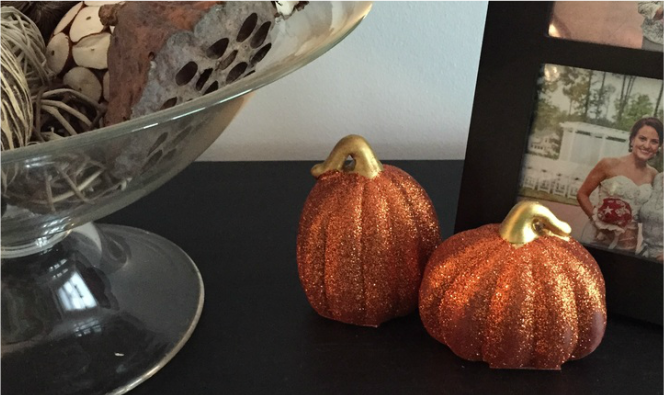
Sparkly Dollar Tree Pumpkins
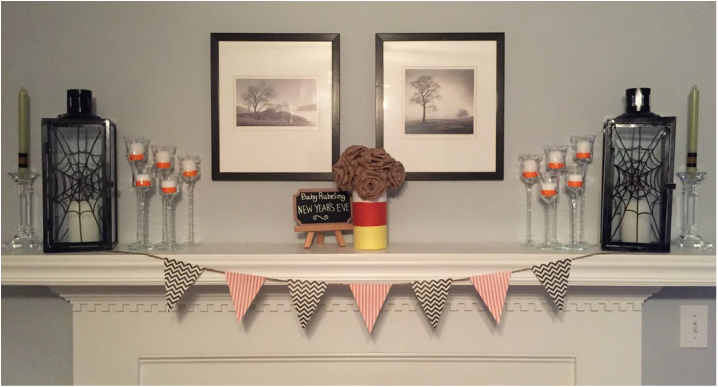
As you can see from the picture of my mantle, I used a lot of these techniques. Instead of replacing my green candlesticks, I wrapped some black and orange ribbon around the base of them. I wrapped some thin orange ribbon around the bottom of my small white candles as well. I was actually pretty excited about how well the photos on the wall went with the theme. The trees look pretty creepy with the mix. All of these items are part of my everyday decor. I just used some cheap ribbon to spice them up. The flag banner is what I was referring to that I made with some orange and black craft paper. I just cut out some triangles and hot glued them to a rope that I hung. I wrapped a dollar store vase in some white, orange and yellow string to give it a candy corn look and I added some roses I made from burlap ribbon. As for the lanterns, I actually created a tutorial for those that you can find here.
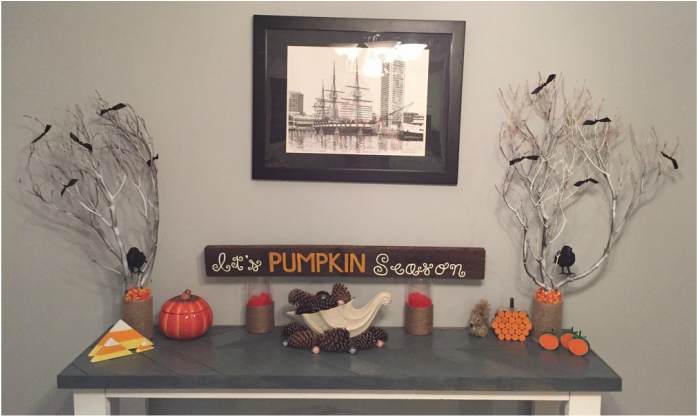
In my gray buffet table photo, I used several of the above-mentioned tips as well. Starting with lots of pumpkins made from different materials. I glued some wine corks together and painted them orange to make one of the pumpkins. I have a tutorial here for the tree branch pumpkins, and one here for the scrap wood candy corns. The sign is made from pallet wood (tutorial here). As for the branches, you can see I filled the vases with candy corn (tip) and wrapped thin black ribbon on some of the thin branches to make them look like bats (tip). For the full tutorial on how I constructed the branches, check it out here.
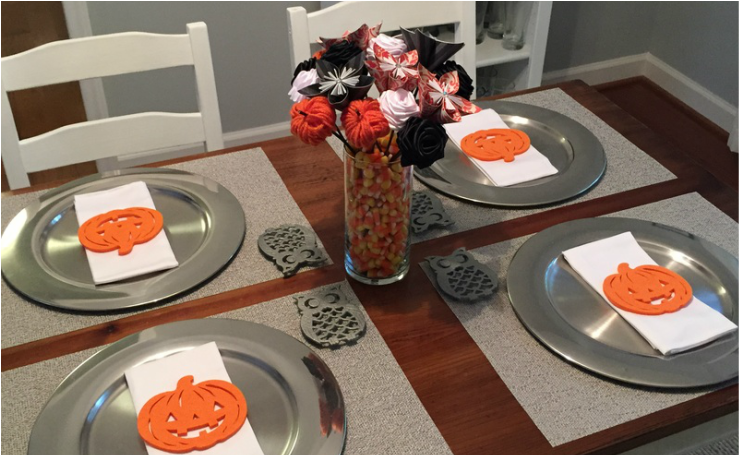
Even my dining room table photo has some DIY inspiration in it. I picked up the owl coasters at a thrift store and cleaned and spray painted them silver. All four of them cost me one dollar! I made the flowers for the centerpiece from materials I had around the house. I have a video tutorial here for the origami flowers. I hope to have a video in the future for the ribbon roses. Click here for the tutorial on the pumpkin yarn flowers. Again, the vase is filled with candy corn to give it that special Halloween touch.
Well, that's it for my current Halloween decor. However, it's only October 12 and that gives me plenty of time to make some scarier items. Just wait until you see what I have planned for my front porch. We don't get a ton of trick or treaters, but I want the ones we do get to be impressed with my efforts. This holiday rocks!
Be sure to click on all the links to check out the new tutorials. Here is a list of them for those who want to make some Halloween decorations of their own!
NEW Tutorials:
Spider Web Lanterns - NEW!
Spooky Tree Branches - NEW!
Pumpkin Yarn Flowers - NEW!
Other Tutorials:
Tree Branch Pumpkins
Scrap Wood Candy Corn
"It's Pumpkin Season" Sign
Origami Flower Video Tutorial
In my gray buffet table photo, I used several of the above-mentioned tips as well. Starting with lots of pumpkins made from different materials. I glued some wine corks together and painted them orange to make one of the pumpkins. I have a tutorial here for the tree branch pumpkins, and one here for the scrap wood candy corns. The sign is made from pallet wood (tutorial here). As for the branches, you can see I filled the vases with candy corn (tip) and wrapped thin black ribbon on some of the thin branches to make them look like bats (tip). For the full tutorial on how I constructed the branches, check it out here.
Even my dining room table photo has some DIY inspiration in it. I picked up the owl coasters at a thrift store and cleaned and spray painted them silver. All four of them cost me one dollar! I made the flowers for the centerpiece from materials I had around the house. I have a video tutorial here for the origami flowers. I hope to have a video in the future for the ribbon roses. Click here for the tutorial on the pumpkin yarn flowers. Again, the vase is filled with candy corn to give it that special Halloween touch.
Well, that's it for my current Halloween decor. However, it's only October 12 and that gives me plenty of time to make some scarier items. Just wait until you see what I have planned for my front porch. We don't get a ton of trick or treaters, but I want the ones we do get to be impressed with my efforts. This holiday rocks!
Be sure to click on all the links to check out the new tutorials. Here is a list of them for those who want to make some Halloween decorations of their own!
NEW Tutorials:
Spider Web Lanterns - NEW!
Spooky Tree Branches - NEW!
Pumpkin Yarn Flowers - NEW!
Other Tutorials:
Tree Branch Pumpkins
Scrap Wood Candy Corn
"It's Pumpkin Season" Sign
Origami Flower Video Tutorial
 RSS Feed
