Today's post is the last of the Halloween crafts for the year. I realize that this tutorial comes a little late for anyone to use for this season, but it was a last minute project I did the morning of Halloween, and I wanted to share. We only got a few trick-or-treaters and the hubby is not a big fan of the holiday so hopefully someone will get a kick out of this display. Harry Potter fans, maybe?
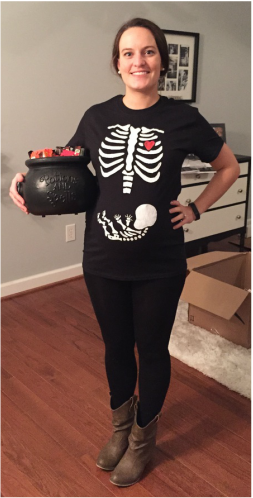
Anywho... Halloween was a very long day for us. We spent 6 hours at the dealership buying me a new car. By the time we got home, baby and I were starving and we'd missed half of the neighborhood kids. So I ended up with 18 full-sized candy bars that I'm sure won't last as long as they should. But I still donned my last-minute Halloween costume and smiled for the little princesses and Jedi Knights.
In a very rare turn of events, I have actually posted a picture of my pregnant self on the internet. Mainly because I thought the shirt I made was worth sharing. I found some skeleton stencils on Pinterest and used my Freezer Paper T-Shirt tutorial to paint the design on my shirt.
Skelebaby!
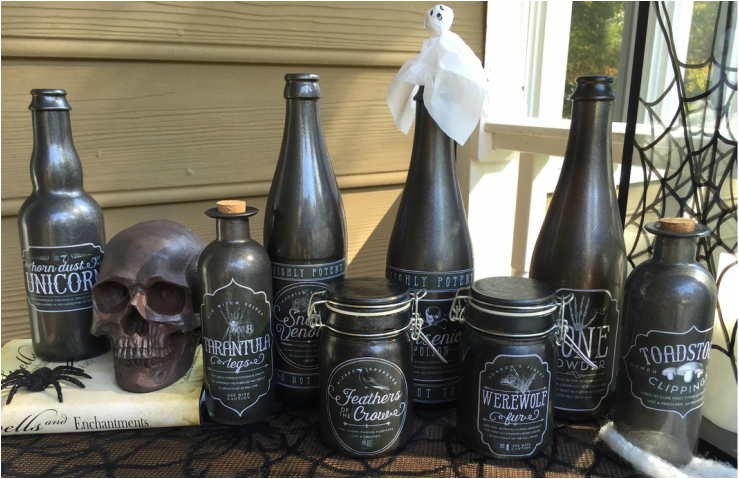
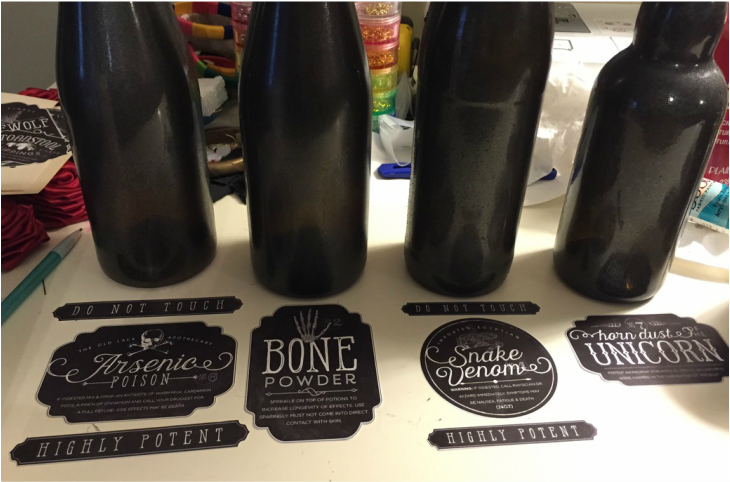
But back to the actual reason for this post... my DIY potion bottles. I wanted to make a display that would attract the kids to our house and make them remember the awesome neighbors that made an effort for Halloween. Or I just love the holiday and wanted to make cool stuff that I could blog about later. Either way, that's how the idea for the bottles came about.
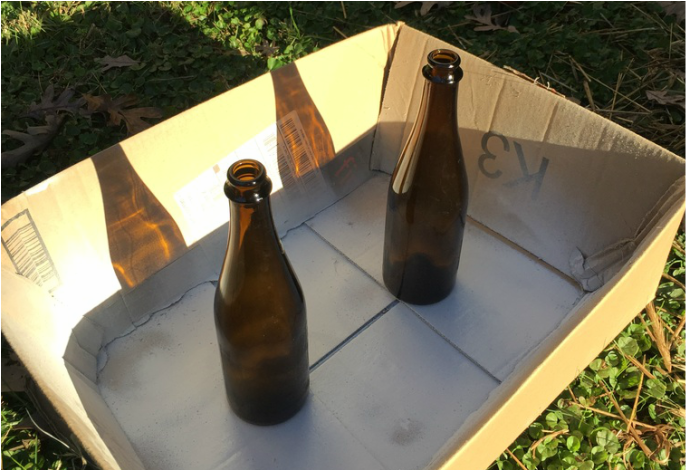
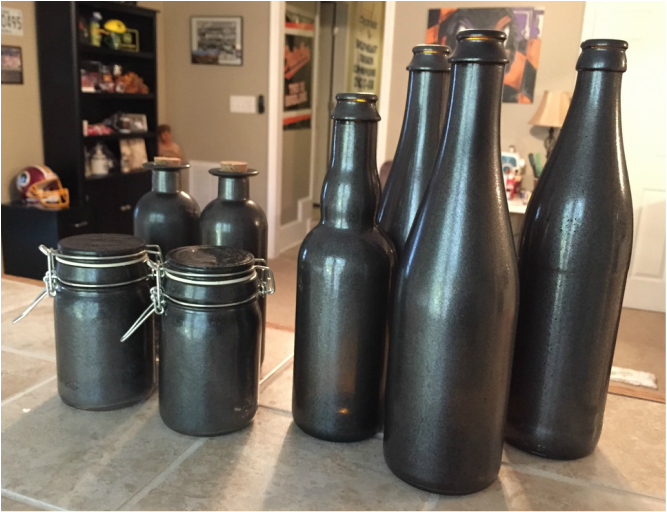
I thought of the idea a while back and just never really got around to doing the actual work. So when Halloween morning rolled around and I didn't have a cool display, I launched into action. First, I removed some labels from a few beer bottles. I soaked them in hot, soapy water for a few minutes, then scraped the labels and residue off with a drywall knife. I dried them and gathered them up with the other jars and bottles I bought at A.C. Moore. They were on sale for something like a dollar a piece.
Once I had the bottles I wanted to use, I set up a spot in the yard to start painting them. I used a cardboard box and sprayed them two at a time.
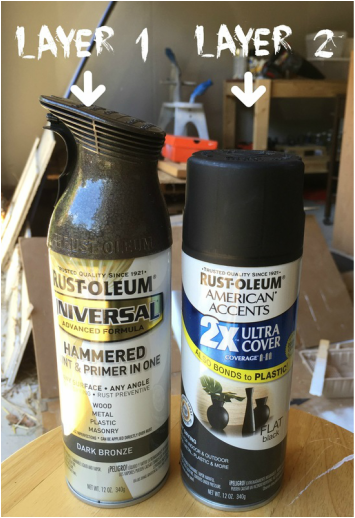
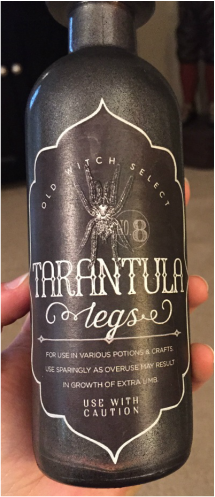
I used a Rust-Oleum Hammered spray in dark bronze to give the bottles a rustic base coat with a little bit of texture. I sprayed one layer just to make them opaque.
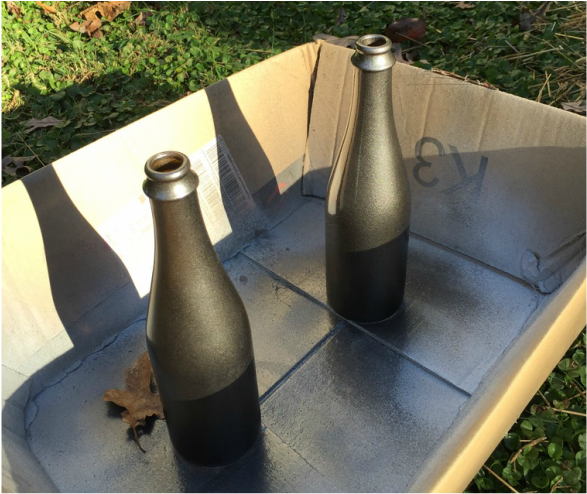
Then I sprayed a light layer of a flat black spray paint over the dark bronze layer. Not enough to cover it. Just to darken it up a little and give it a mottled look.
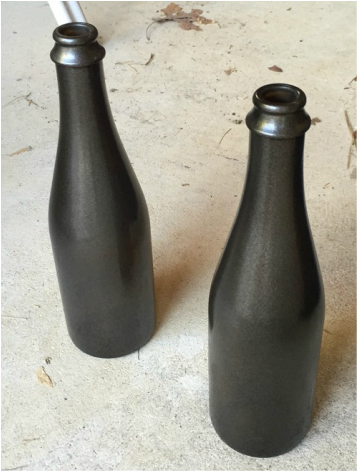
Once I let all the bottles and jars dry, I brought them inside to apply the labels.
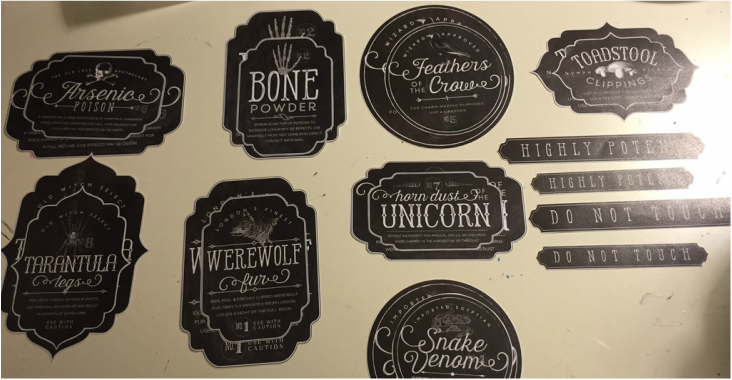
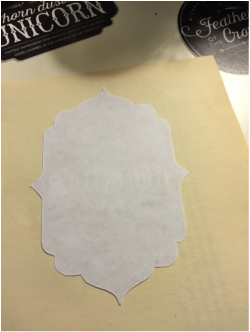
I found some great FREE labels here on Pinterest. I printed them out in two different sizes and cut them out. I decided which labels I wanted to put on which bottles based on their sizes. I took into account what the ingredients were as well, but that wasn't as important. I just made sure the "Feathers of the Crow" weren't stuck in a tall beer bottle that they obviously couldn't be easily removed from. Even though I had no intention of putting anything in any of the bottles. Hence the spray paint.
To apply the labels, I used Mod Podge. For a more detailed tutorial on the awesomeness of Mod Podge, click here. As for this project, I just applied it like glue to the back of the labels and stuck them on the bottles.
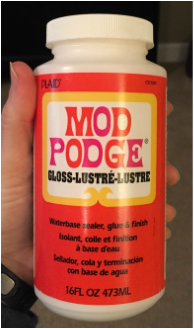
I was strapped for time so I just smoothed the labels down with my hands and did not apply another layer of Mod Podge on top. I might do that before I put the bottles in storage just so they last until next Halloween without getting ripped up.
Once I had all the labels glued on, I added them to my other porch decorations. I took some pictures of the other items I put out.
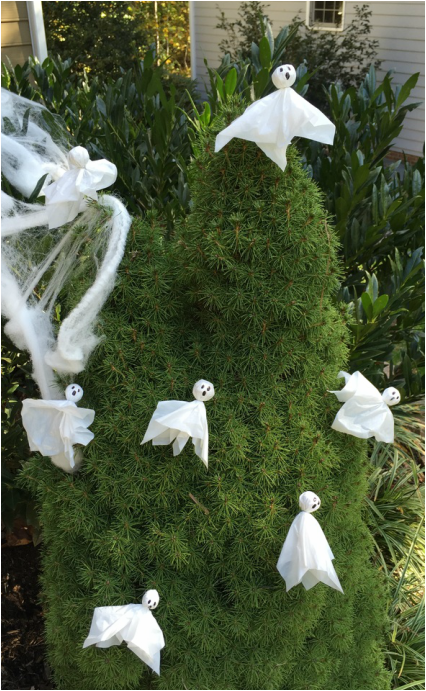
Mini Ghosts from Trash Bags
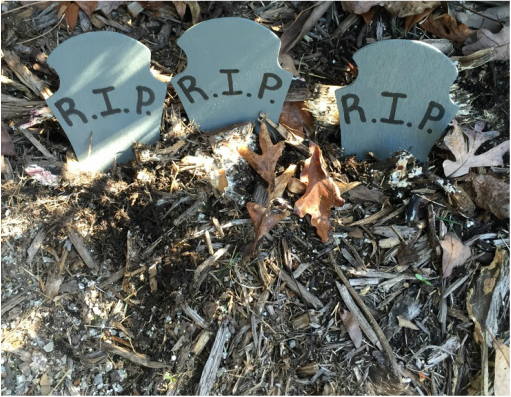
Painted Wooden Tombstones
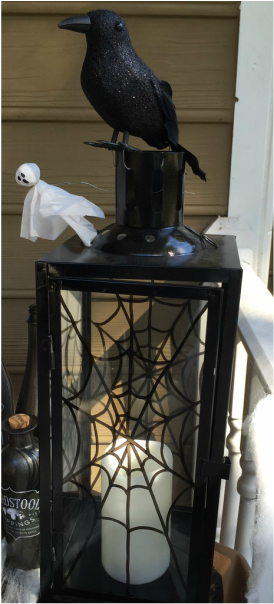
Spider Web Lantern (Tutorial Available)
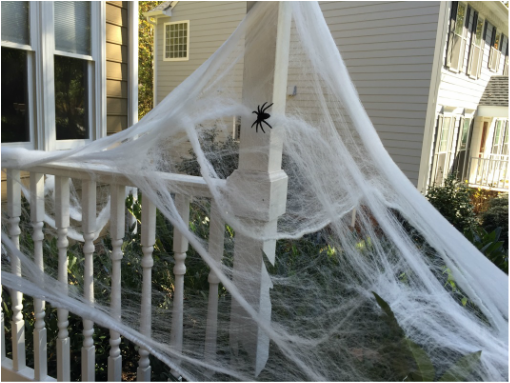
Craft Store Spider Webs with Giant Plastic Spiders
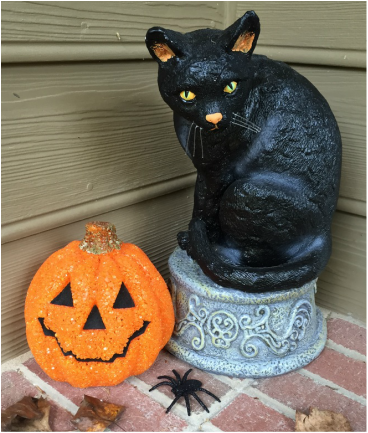
Creepy Black Cat (Thrift Store Find) and Jack-O-Lantern
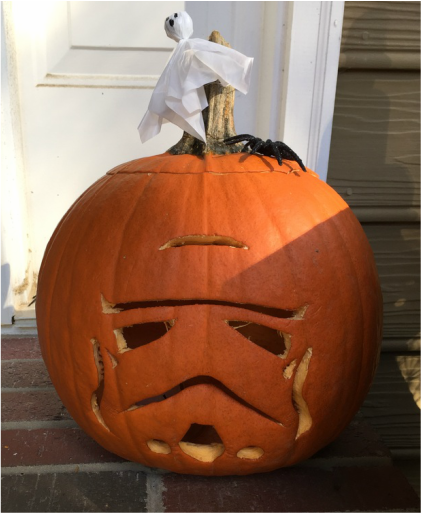
Hubby's Contribution - Stormtrooper Pumpkin
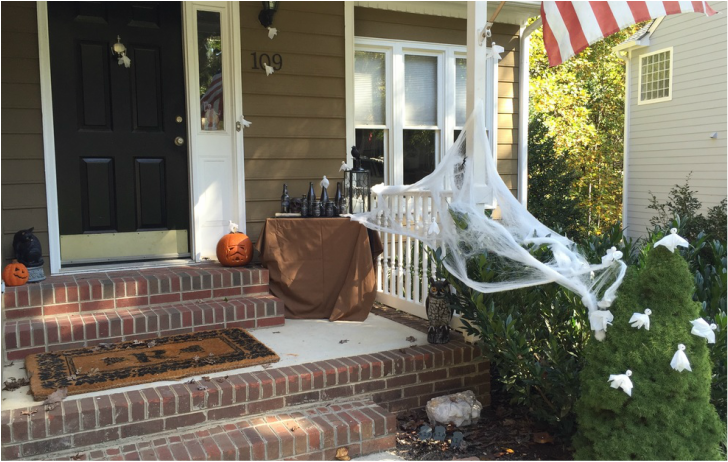
The Full Effect - In Daylight
Considering the table with the potion bottles was a last-minute addition, I was pretty pleased with the results. It's only the second year we've been in a house for Halloween, and this is a vast improvement from last year's display. I figure I will just step it up every year.
Until next year...
Until next year...

 RSS Feed
