Bird Nest Ring
DIY jewelry has been on my radar for a while now. I'm always prowling Pinterest for different ideas. Generally most of the projects I attempt are cute enough to give as gifts to kids at Christmas. And that works out fine for me. The less gifts I have to go out and purchase during the holiday season, the better. Little girls love jewelry!
I've attempted to make jewelry for myself to wear, but it always ends up looking too amateurish. Perfect for kids or costume play, but just not quite ready for the public adult arena.
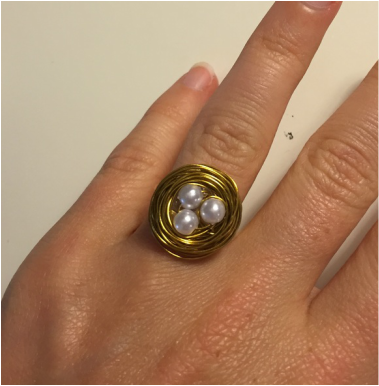
I came across the idea of using beads and wire to make jewelry that looks like bird's nests with eggs. I decided to try my own version of it and I was pleasantly surprised. It was the first piece of jewelry that I actually wanted to wear.
I took pictures and documented my process below.
I've attempted to make jewelry for myself to wear, but it always ends up looking too amateurish. Perfect for kids or costume play, but just not quite ready for the public adult arena.
I came across the idea of using beads and wire to make jewelry that looks like bird's nests with eggs. I decided to try my own version of it and I was pleasantly surprised. It was the first piece of jewelry that I actually wanted to wear.
I took pictures and documented my process below.
Project Materials
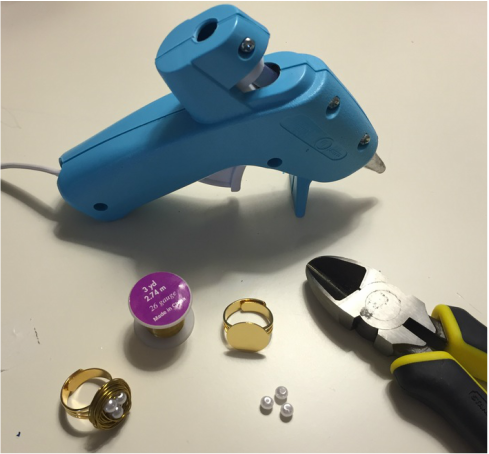
Materials List:
3 Small Beads
1 Yard of 26 Gauge Wire
1 Blank Ring (I got mine from HERE)
Hot Glue Gun
Wire Cutters
3 Small Beads
1 Yard of 26 Gauge Wire
1 Blank Ring (I got mine from HERE)
Hot Glue Gun
Wire Cutters
| Step 1: Measure the Wire Measure out the 26 gauge wire you are going to use. The length will depend on how big you want your nest to be. I used approximately one yard for my ring. The wire I used was gold to match the ring color I purchased. Step 2: Add the Beads String your beads onto the wire in a neat row. You can use as many beads as you like. I used three because I thought any more than that looked too crowded. Step 3: Form a Bead Circle Twist the wire so the beads form a tight circle. The end of the wire will overlap the rest of the wire. Step 4: Twist the Wire Twist the end of the wire with the remaining wire to close and tighten the bead circle. Leave the very end hanging off. Step 5: Tuck Wire and Start a Circle Tuck the twisted wire under the beads and start forming a circle with the longer length of wire around the beads. Keep it as tight as possible to avoid big space gaps. Step 6: Spin and Tuck Keep forming circles with the wire around the beads. Every so often, tuck the wire through the layers of circles and under the beads. This tightens up the circles and prevents a bungy/spring effect. Step 7: Complete the Circle When the circles are finished, tuck the final piece into the center of the circles under the beads. That part will be glued. Step 8: Apply Hot Glue Apply a layer of hot glue to the face of the ring base. Do not make it too thick or it will seep up through the beads and be visible. Step 9: Press on Bird Nest Press the completed bird nest on to the hot glue and hold it down until it dries. Check the underside of the ring to make sure it is on straight. Step 10: Wear It! I think this step is pretty self explanatory. | 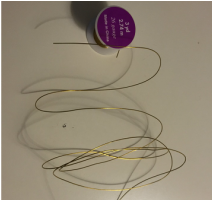  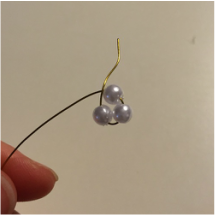 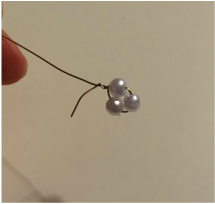 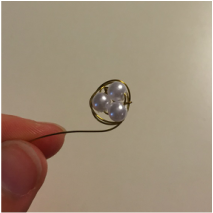 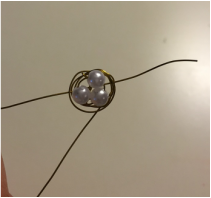 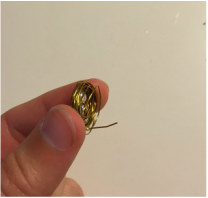 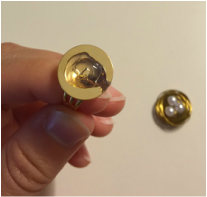 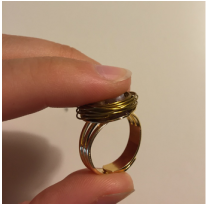 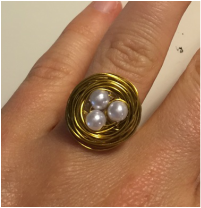 |
I love the way it turned out. I thought the gold contrasted well with the little pearl beads I used. I do have several notes about my process.
First, I decided to purchase the ring base separately. A lot of the tutorials on Pinterest had people creating the ring base with the actual wire. I chose not to do that so I could get an adjustable base. Now I can wear the ring on any finger and loan/gift it to anyone I want.
Second, I used materials that I already had around the house. The higher quality materials used, the better the project will look. I am pleased with the way my ring turned out, but it is definitely not upscale jewelry. If you do a little research you can find quality wire and beads from different vendors.
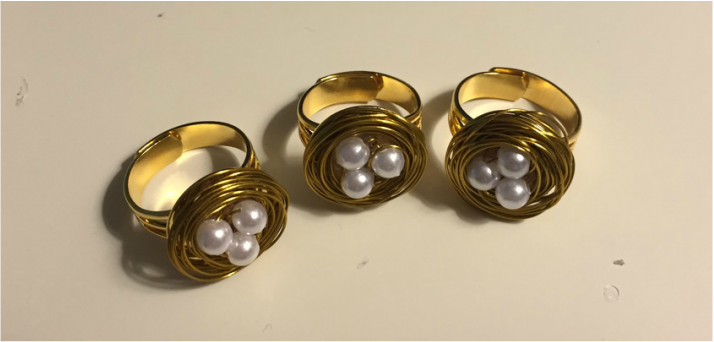
Finally, since I was so happy with the result, and I had extra materials, I made several extra rings. So if you are not the crafty type, but you still want some cute DIY jewelry, you can have some of mine! I put some listings up in the STORE section of my site. $10 will get you a bird's nest ring with shipping included and it will help me fund my next project. Cheers!
First, I decided to purchase the ring base separately. A lot of the tutorials on Pinterest had people creating the ring base with the actual wire. I chose not to do that so I could get an adjustable base. Now I can wear the ring on any finger and loan/gift it to anyone I want.
Second, I used materials that I already had around the house. The higher quality materials used, the better the project will look. I am pleased with the way my ring turned out, but it is definitely not upscale jewelry. If you do a little research you can find quality wire and beads from different vendors.
Finally, since I was so happy with the result, and I had extra materials, I made several extra rings. So if you are not the crafty type, but you still want some cute DIY jewelry, you can have some of mine! I put some listings up in the STORE section of my site. $10 will get you a bird's nest ring with shipping included and it will help me fund my next project. Cheers!
 RSS Feed
